Showing posts with label CorelDRAW. Show all posts

Tuesday, December 8, 2009

Example Design with CorelDRAW


Some examples of using CorelDRAW Design I ever made was :


  1. Bungkus Pasta Gigi

  2. Bungkus Rokok

  3. Brosur

  4. Cover Buku

  5. Flashdisk

  6. Peta atau Atlas

  7. Stempel

  8. Laptop

  9. Kartu Undangan Pernikahan

  10. Kartu Nama

  11. Logo


Read their own direct tutor in several parts of this article, click there to download the source file :


Part 1, Part 2,
Part 3,
Part 4,
Part 5,
Part 6 and password


Wednesday, December 2, 2009

Design Cover CD


Have you seen ?!?

Cover / Skin from the favorite CD from your home ?!?


aim to:


  1. Make More beautifull

  2. For us to know what the contents of the CD

  3. Showing label maker

  4. and many others, hahaha


How to make :


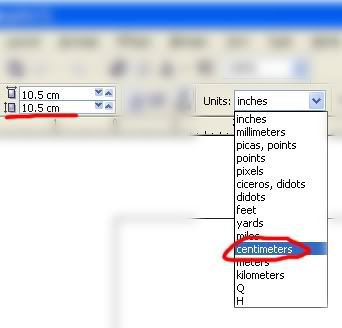
Start work, and the first thing to consider is: set ruler units of measure and in CorelDraw by looking at the Properties panel (Docker properties) we use in units of centimeters (inches)


CD has a diameter of 12 cm, but now we reduce the size to fit when placed on a CD that has been filled content.


size for length and width: 10.5 cm


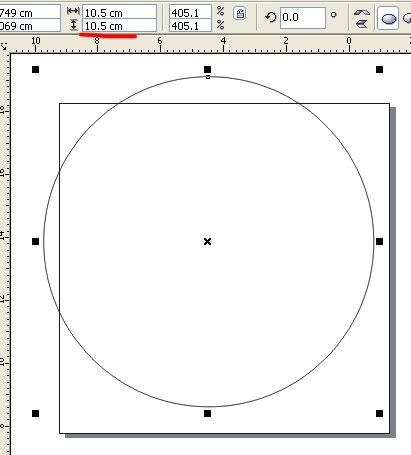
the first object that we make a circle and make use Ellipse tool.


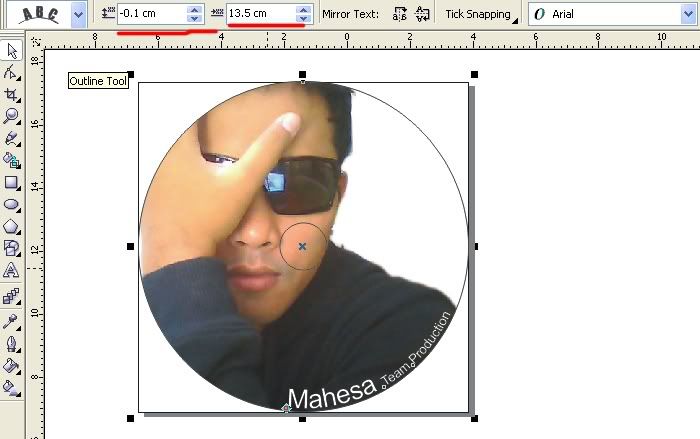
length and width of order objects according to desire, menengoklah at Docker / properties panel (shown in the image above). set the length and width 10.5 cm.


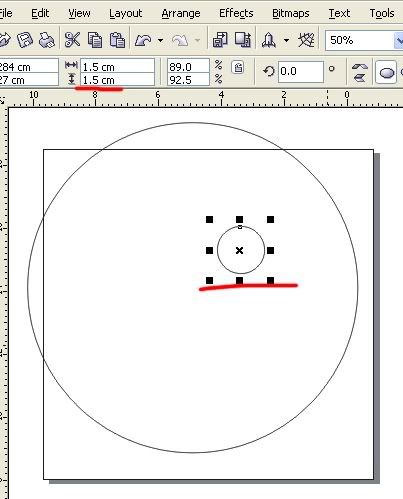
Create another circle of objects, and again we look Docker / long, adjust the properties panel and 1.5 cm wide.


We will often look at Docker / panel properties so do not be tired to see there, hahaha

to flatten the object, use the Align and Distribute facility on the panel / Docker properties
Please be sure both objects selected, then activate the Align and Distribute window, select the Distribute Vertical: Center, Horizontal: center and Distribute to: Extent of Page and Apply (see picture)


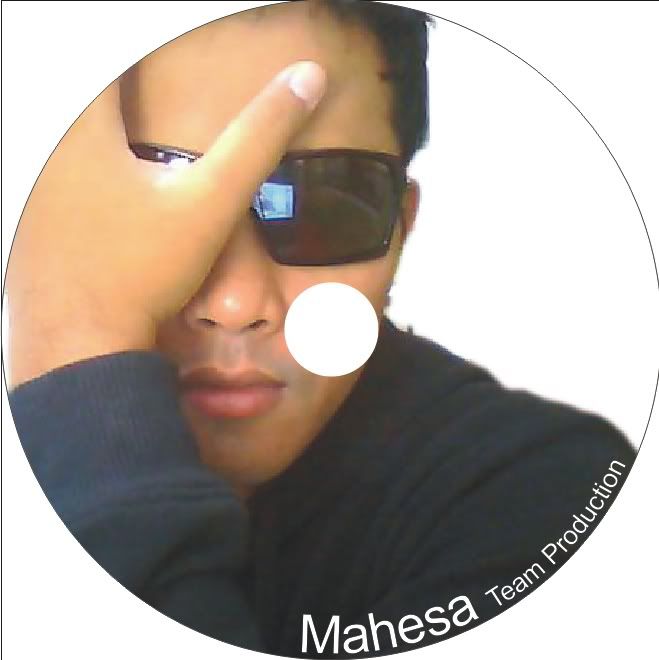
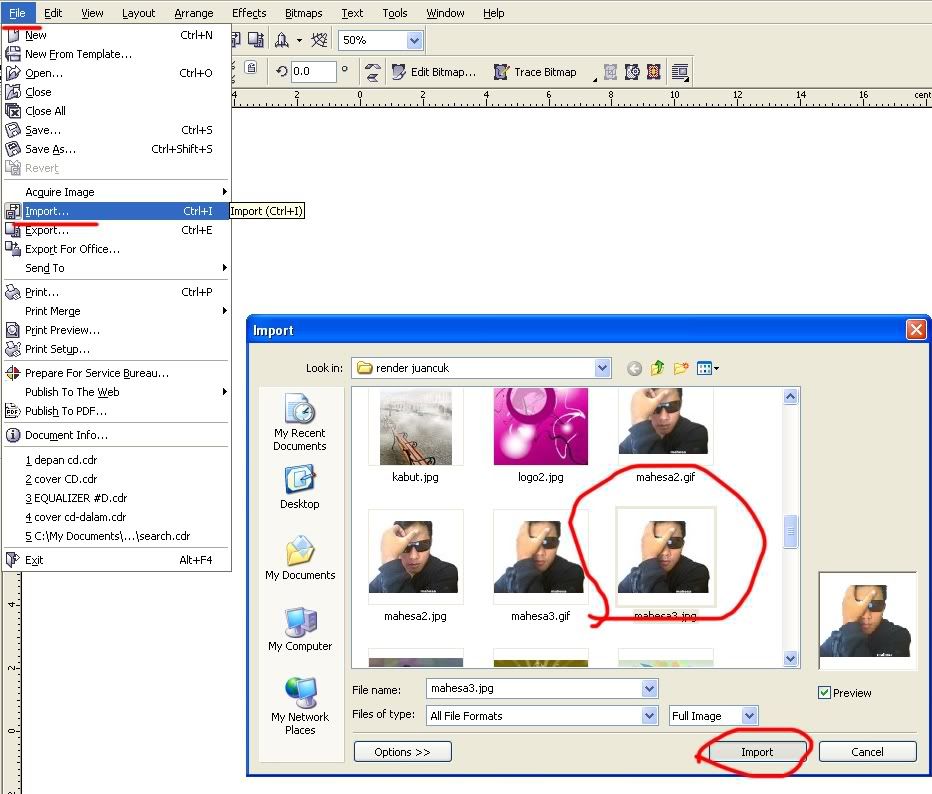
Begin to import an image that will be put into the middle of the CD, I use the example of our first gatra "Bli Mahes"


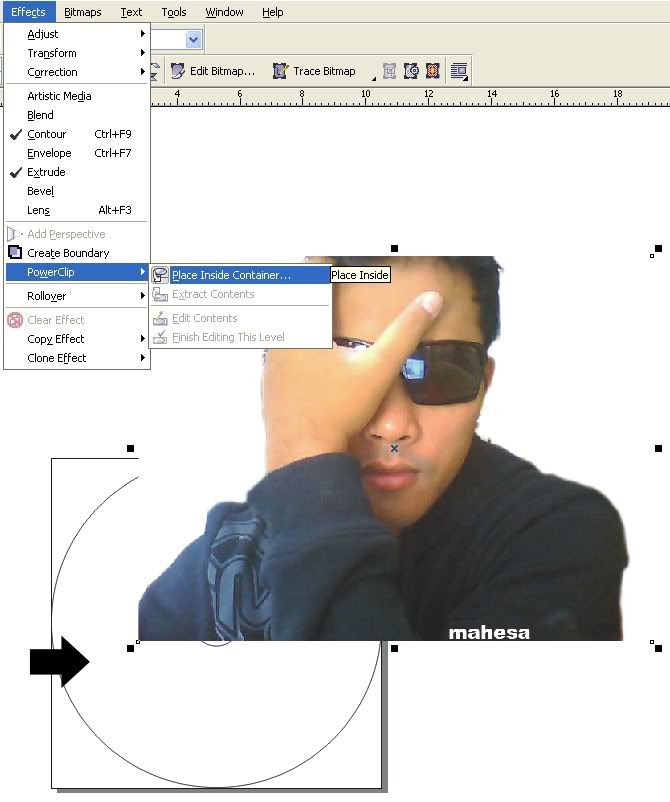
Well now place objects in the middle of the circle, make sure the image just import selected.

Effects> Powerclip> Place Inside Container.


Surely satisfactory results have not been ...


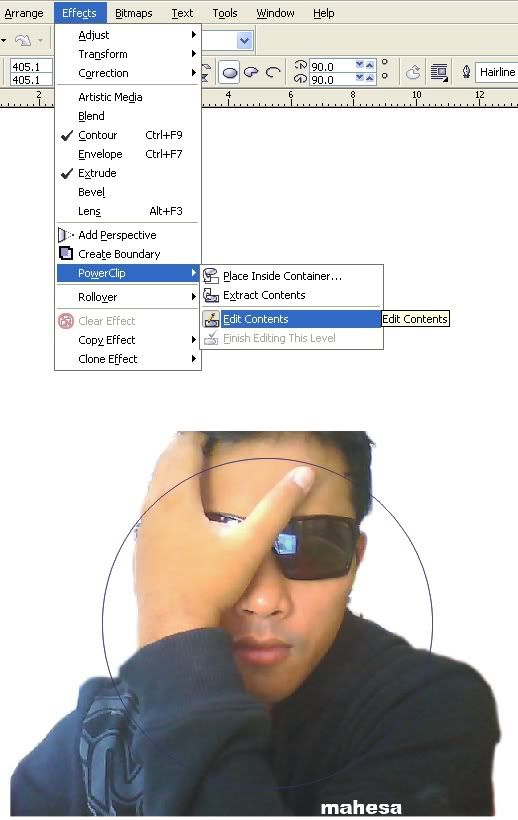
Back to the Effects menu > Powerclip > Edit Contents.


Set size / position of this import images. if it is returned to the Effects menu > Powerclip > Finish Editing this level.


Addition Text:


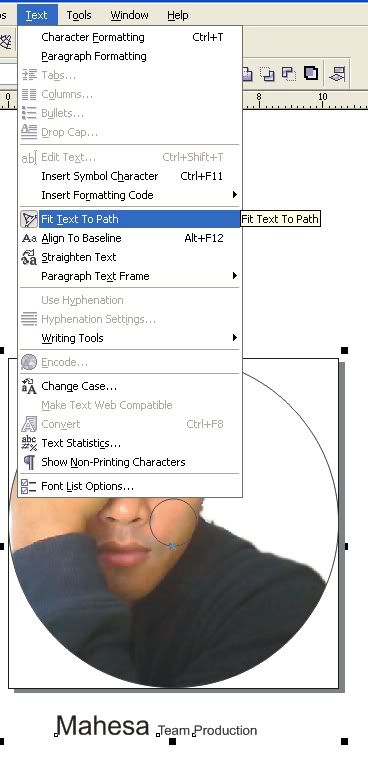
Add text, such examples: Mahesa Production Team, with sizes up to us.


Then selection and circle text objects that contain images, then select the menu Text> Fit Text to Path.


Selection text look back panels / Docker properties (see the figure) set the text position attached to the circle and give the text with white color (because backgroundnya almost black, so that the text visible) content values, respectively: -0 , 1 cm and 13.5 cm [not setting absolute].


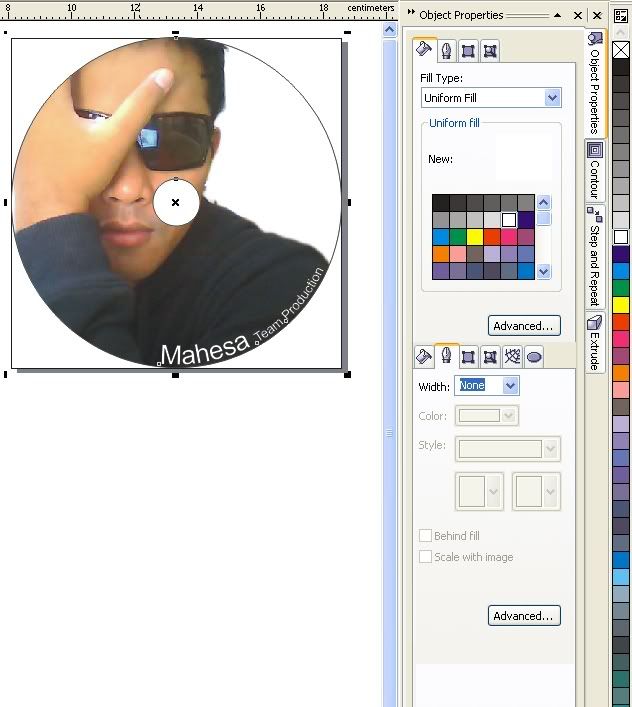
Finally, selection of a smaller circle and white berries and remove the line (see picture).


If anyone have a better idea Please give a comment to this artikel, or maybe the article is less complete tutorial or something is wrong ... Forgiving me, hehe, and do not forget to comment, ok ...!!!


Saturday, November 28, 2009

Create 3d Equalizer Music with CorelDRAW


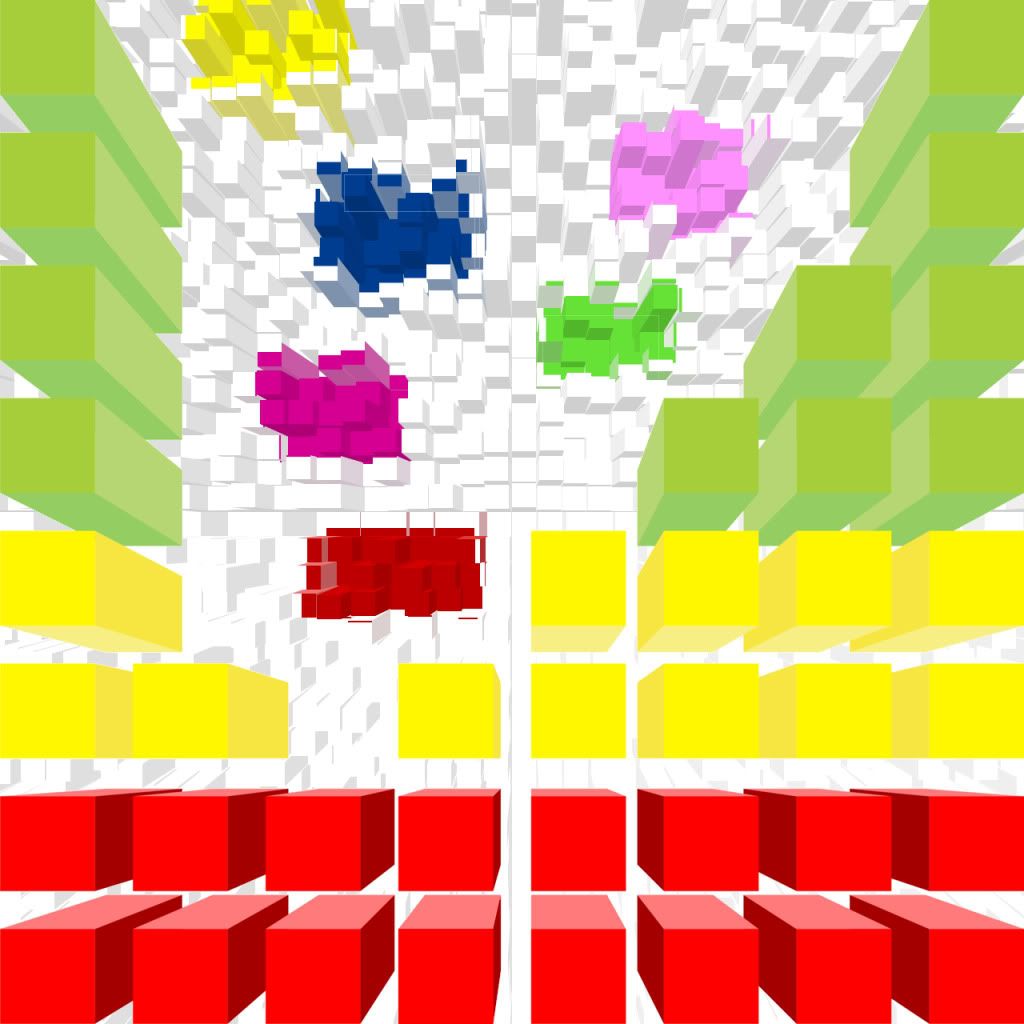
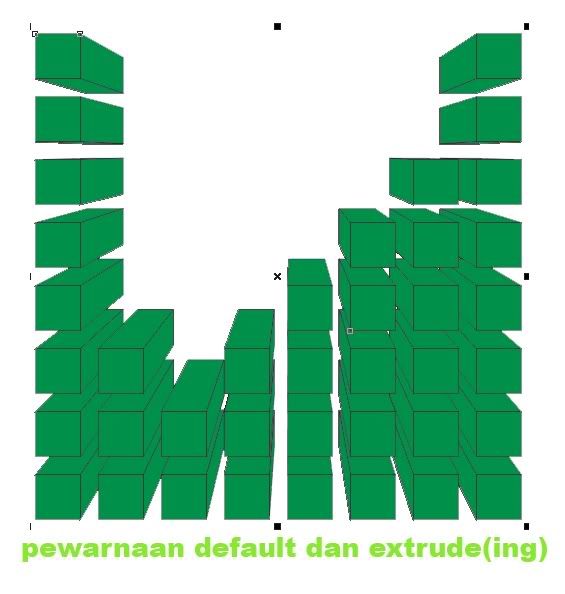
Although vector drawing application, you can still play with 3D images. Yes, this application can be used to make three dimensional images of objects in the drawing process. This can be used to make three dimensional images of objects in the drawing process. This is thanks to the presence of the facility "Extrude Tool" which makes the 3D image creation process easier.

to try it, you can follow the guide to make 3D images of music equalizer following CorelDRAW. The same tool you can apply to other objects such as text, for example. To create 3D text like a Superman comic book titles.


  1. Equalizer is a composition of colored boxes that usually appears in amplifier devices. To start it, make a box with [Rectangle Tool]. Click-drag the pointer while pressing [Ctrl] to form a rectangle the same side.
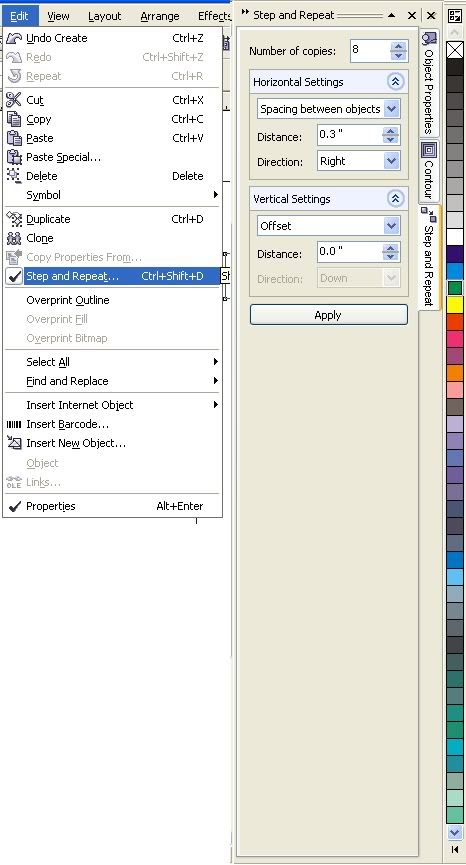
  2. To create a line box, click the [Edit]> [Step and Repeat ...]. Step and Repeat Docker will appear. Draw a vertical line of the box. Fill in the box to make the box "Number of copies:". In the "Horizontal Settings", select [offset], and fill the box "Distance" with 0.0.
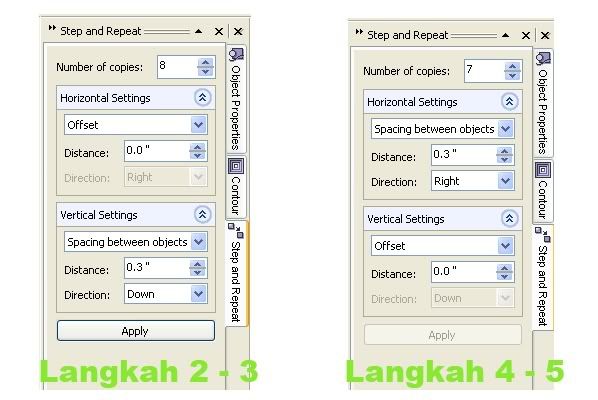
  3. In "Vertical Settings", select [spacing Between Objects], and fill the distance between the box number in the "Distance". Here, the value of optional 0.3-inch distance. Next, click [Apply]. Then a new box, a number of values that have been dumasukkan to "Number of copies", will appear.
  4. Selection of all boxes with click and drag the pointer around the board. Create horizontal rows of boxes. Select [offset] and fill 0.0 on "Distance" in the "Vertical Settings". Select [Spacing Between Objects] and fill in boxes 0.3 spacing in "Distance" in the "Horizontal Settings".
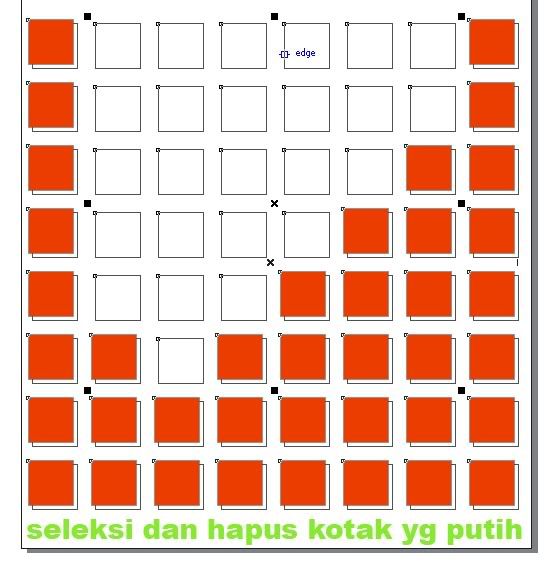
  5. Fill in the number of duplications in the box "Number of copies:", and then [Apply]. Range box will appear.
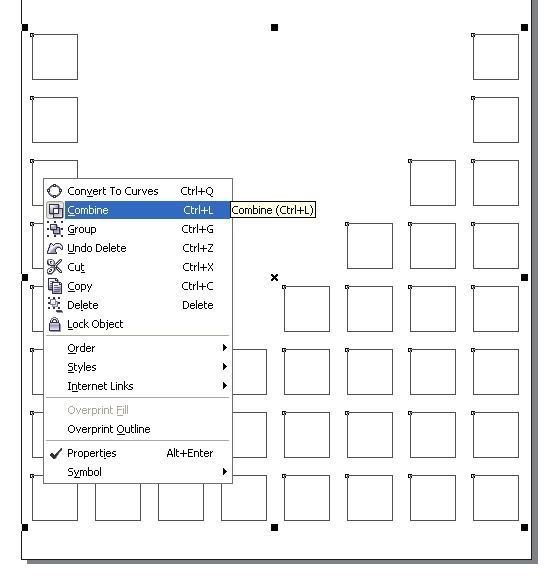
  6. Range equalizer box is not always the same height, then remove some of the box by clicking on it, then press [Delete]. Selection of the box, right-click the box, and select [Combine].
  7. Show 3D effects. Click [Extrude] in the toolbox. Click on the center line of the box, and then while pressing the [Ctrl], click the pointer to the bottom. Three-dimensional view now emerged. Try color by clicking one of the colors in the color palette.
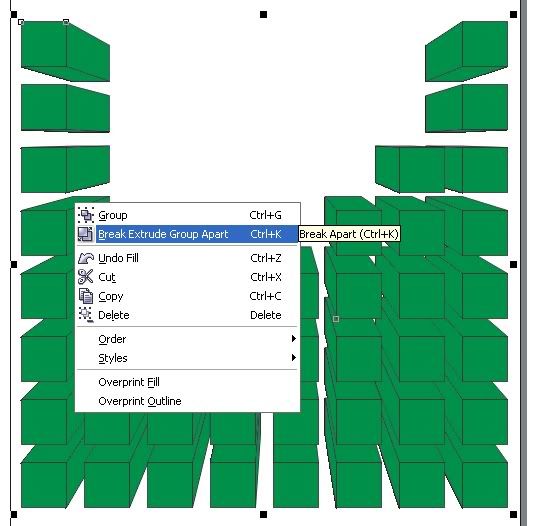
  8. To start coloring, click on [Pick Tool]. Click the line of the box, then select [Arrange]> [Break Apart Extrude Group], or press [Ctrl] + [K]. Right-click on the box, then select [Break Curve Apart]. Selection of a single vertical line of the box, be from the left or right.
  9. Select a color for the range of color palettes to the right of the application window. Next give the color one by one until the end. Selection of all the boxes, then click [Click] + [G]. You can type in text to enhance this design.

This certainly making only efect 3D tutorial basic, you can further develop their own techniques of the above.


What is certain before I render a lot sorry if something is missing ... hehehe


Saturday, November 21, 2009

Membuat pola bunga dengan polygonal tool


Maybe this tutorial tips are widely known, usually written in the books. but now I try to write for people who do not know and control who knows a little money, hehehe ...


langsung saja, pertama-tama buatlah sebuah lembar kerja dengan ukuran terserah anda... atau bisa dibilang abaikan semua settingan awal.


lalu buatlah objek polygon dengan ukuran sesuai anda, pada panel properties atur [ Number of point or sides on polygon, star and complex star ], yang saya gunakan adalah 8, tapi nilai ini tidak mutlak anda bisa menggunakan nilai yang lain. ( untuk lebih jelasnya lihatlah pada gambar dibawah... )


Lalu gunakan shape tool untuk memulai membentuk objek polygon tadi


seteleah membuat lekukan pertama, lalu klik salah satu node ( node adalah titik kecil point dari sebuah garis dari sebuah objek ) lalu convert node tadi ke bentuk Curve, option ini terdapat pada Properties Panel


Pada gambar paling kiri saya beri nomor 1, pada objek ini salah satu nodenya sudah di convert dan sudah dirubah bentuknya menggunakan shape tool.


Lalu lakukan pada Node yang lain dan ulangi langkah sebelumnya ( pada gambar 2 atau tengah-tengah ).


Pada gambar ketiga atau paling kanan, adalah hasil dari pengolahan Polygonal tool atau bisa dibilang hasil akhir, hehehe...


Kalo ada yang kurang mohon dimaafkan ya... maklum namanya juga masih belajar...


CopyRights Narayana Yein dengan coding template dari kendhin's blog, Narayana yein 2009. Hosting by 000webhost and domain from www.co.cc