
Have you seen ?!?
Cover / Skin from the favorite CD from your home ?!?
aim to:
- Make More beautifull
- For us to know what the contents of the CD
- Showing label maker
- and many others, hahaha
How to make :
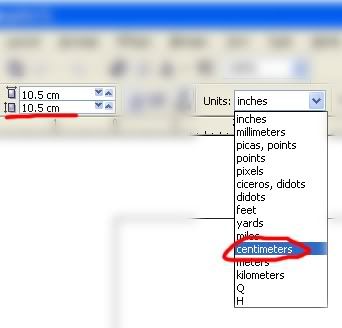
Start work, and the first thing to consider is: set ruler units of measure and in CorelDraw by looking at the Properties panel (Docker properties) we use in units of centimeters (inches)
CD has a diameter of 12 cm, but now we reduce the size to fit when placed on a CD that has been filled content.
size for length and width: 10.5 cm
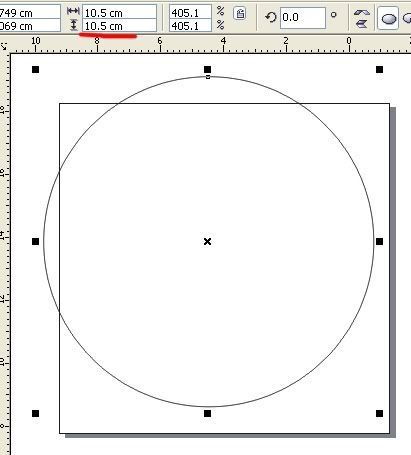
the first object that we make a circle and make use Ellipse tool.
length and width of order objects according to desire, menengoklah at Docker / properties panel (shown in the image above). set the length and width 10.5 cm.
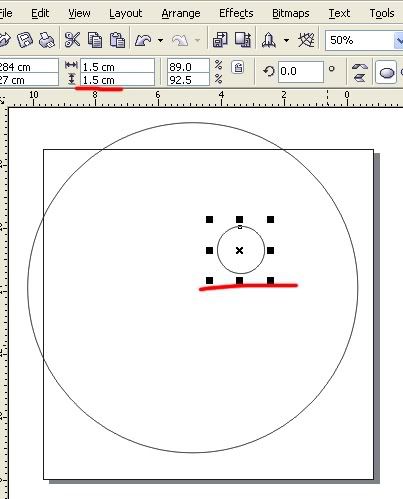
Create another circle of objects, and again we look Docker / long, adjust the properties panel and 1.5 cm wide.
We will often look at Docker / panel properties so do not be tired to see there, hahaha
to flatten the object, use the Align and Distribute facility on the panel / Docker properties
Please be sure both objects selected, then activate the Align and Distribute window, select the Distribute Vertical: Center, Horizontal: center and Distribute to: Extent of Page and Apply (see picture)
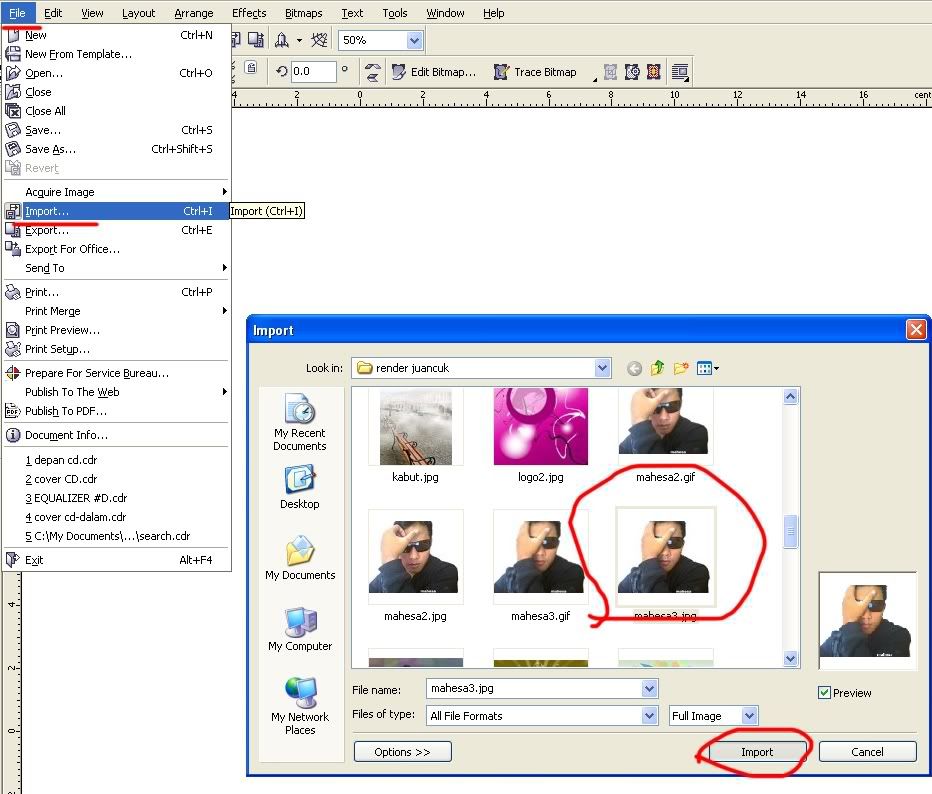
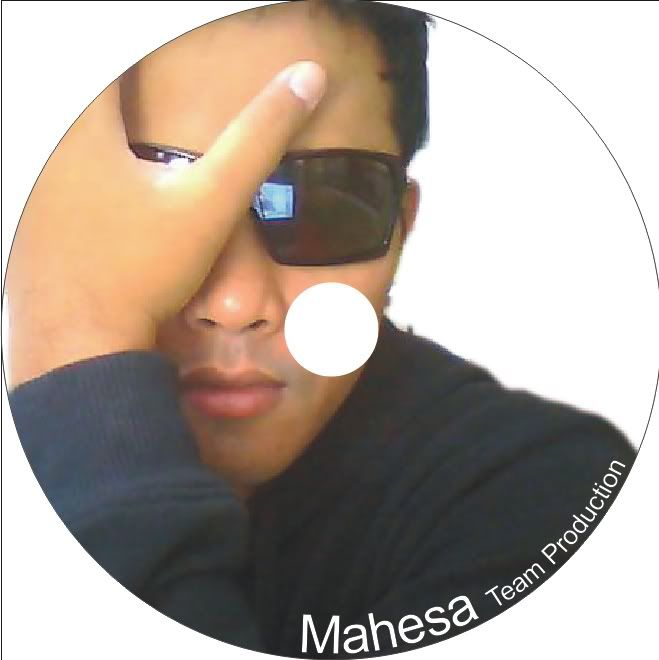
Begin to import an image that will be put into the middle of the CD, I use the example of our first gatra "Bli Mahes"
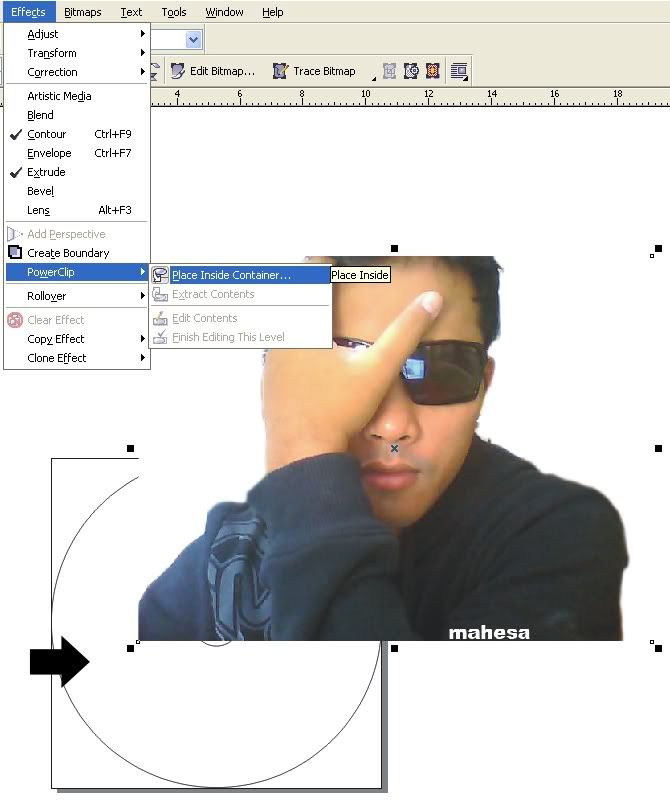
Well now place objects in the middle of the circle, make sure the image just import selected.
Effects> Powerclip> Place Inside Container.
Surely satisfactory results have not been ...
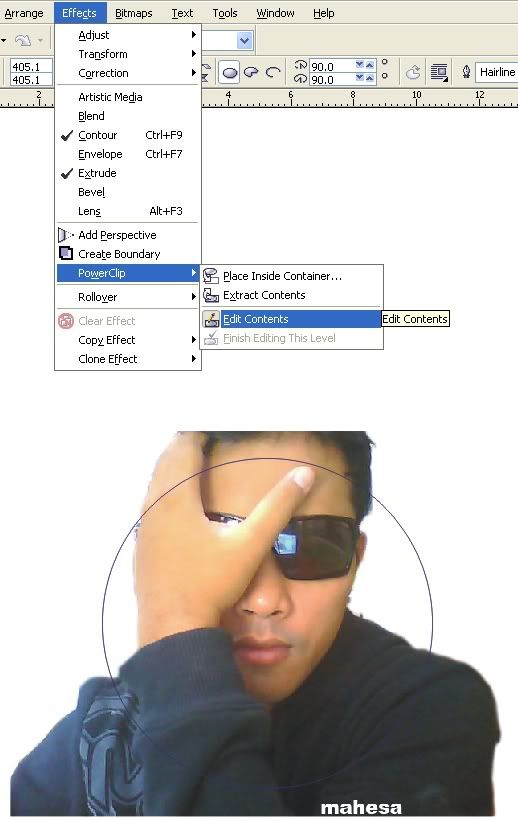
Back to the Effects menu > Powerclip > Edit Contents.
Set size / position of this import images. if it is returned to the Effects menu > Powerclip > Finish Editing this level.
Addition Text:
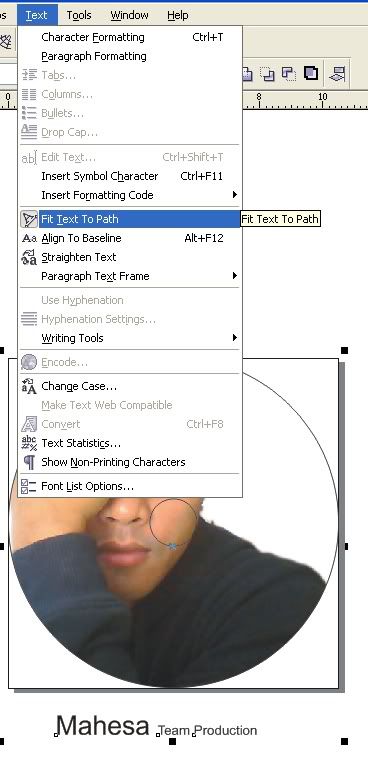
Add text, such examples: Mahesa Production Team, with sizes up to us.
Then selection and circle text objects that contain images, then select the menu Text> Fit Text to Path.
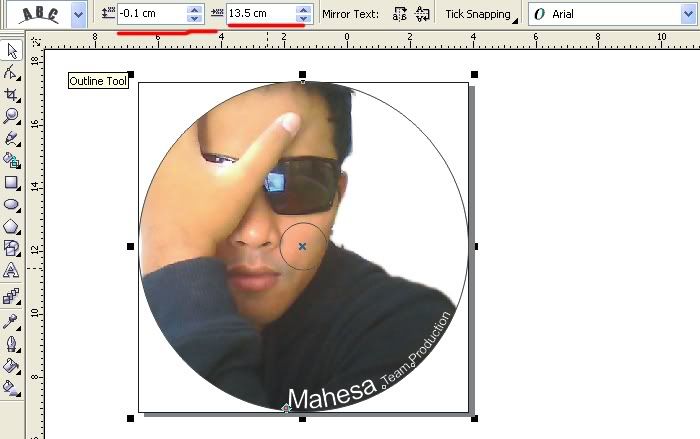
Selection text look back panels / Docker properties (see the figure) set the text position attached to the circle and give the text with white color (because backgroundnya almost black, so that the text visible) content values, respectively: -0 , 1 cm and 13.5 cm [not setting absolute].
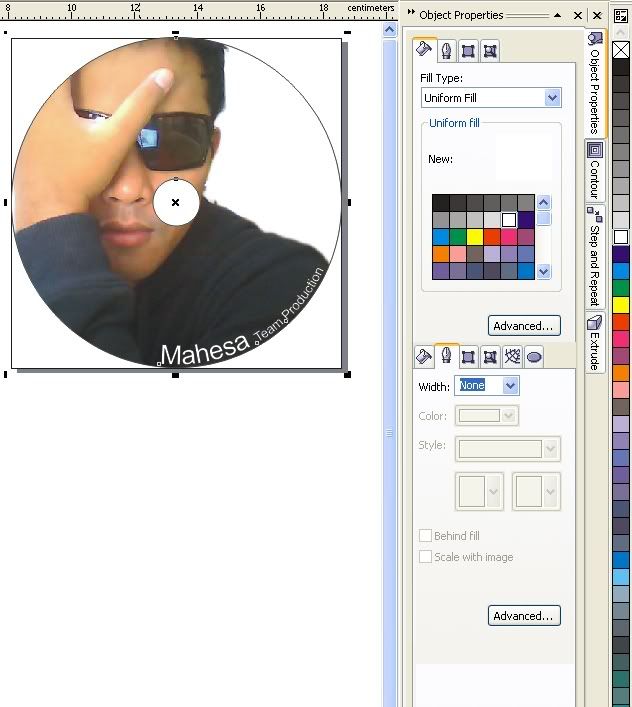
Finally, selection of a smaller circle and white berries and remove the line (see picture).
If anyone have a better idea Please give a comment to this artikel, or maybe the article is less complete tutorial or something is wrong ... Forgiving me, hehe, and do not forget to comment, ok ...!!!


0 comments:
Post a Comment