Wednesday, December 23, 2009

Jepun


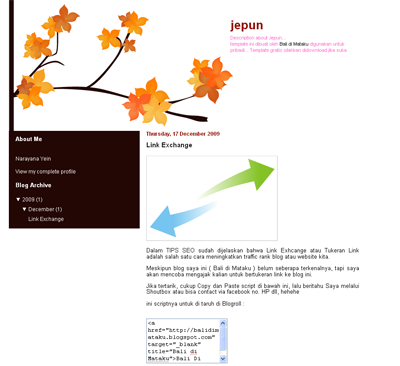
Jepun free template 2 bars (sidebar to the left and the right is main wrapper [the post] )


Outer-wrapper : 800px (Width template). this template have variable color and size, so you can change that by way you want by selecting the font and color tab on the main page to edit your blog.

If you like for this design just download this fileand the password, and also you can see the demo here


Monday, December 14, 2009

Link Exchange


In the TIPS SEO explained that the link Exhcange or Tukeran Link is one way of increasing traffic rank of our blog or website.


Although my blog is (Bali in my eyes) is not how famous, but I will try to take you to bertukeran link to this blog.


If interested, simply copy and paste the script below, then tell the Shoutbox or I can contact via facebook no. HP etc, hehehe


This scriptnya to the place in Blogroll :


and this for banner, 190 x 136px :


The result will look like this


Previously thanks if you are willing to exchange links on this blog, confirmation link soon I will do as soon as possible


Tuesday, December 8, 2009

Example Design with CorelDRAW


Some examples of using CorelDRAW Design I ever made was :


  1. Bungkus Pasta Gigi

  2. Bungkus Rokok

  3. Brosur

  4. Cover Buku

  5. Flashdisk

  6. Peta atau Atlas

  7. Stempel

  8. Laptop

  9. Kartu Undangan Pernikahan

  10. Kartu Nama

  11. Logo


Read their own direct tutor in several parts of this article, click there to download the source file :


Part 1, Part 2,
Part 3,
Part 4,
Part 5,
Part 6 and password


Learning HTML ( Chapter I )


Learning HTML, may have much to be, but it felt incomplete to discuss Dreamweaver reply but not basically stuck on this one, which is HTML (Hypertext Markup Language ).


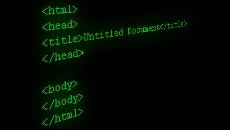
Code above is a simple code to create a web page with HTML, for example :


<html>

<head>

<title>Learning HTML </title>

</head>


<body>

</body>


</html>


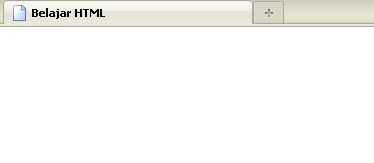
Later in your web browser Firefox Mogilla example will appear as:


Lets I explain the code !!!


<html></html> is the basic syntax foremost if we want to create HTML-based pages,


<head></head> in the syntax we can include population's standard code, such as [ <meta http-equiv="Content-Type" content="text/html; charset=iso-8859-1" />

] may also call 1 or more CSS files, JavaScript, etc.,


<title></title> Text that is in the code will appear in the title of your web browser,


<body></body> This section to put the content of our web-based HTML, for example: Web-based Learning HTML


Image retrieval techniques

Image retrieval techniques


There are a few things to note relating to the camera device.


Before any shooting is a good idea if a cameraman preparations as follows:

  1. Mastery of the camera device to be used. Should follow the written rules on the use of the manual book. Understand the strengths and weaknesses.

  2. Once familiar with the ins and outs of the camera, the scene also understand what and how the technique is desired.

  3. Creating a breakdown of equipment to be used like a battery, microphone, extension cord, etc..

  4. Make sure the battery in good shape and full, and all the facilities at the camera worked well.


In video production activities / movies, there are many types of cameras used.


The division of a video camera / film divided over the media used to store data (image & sound) that have been taken.


Just as in photography, who has taken pictures stored on the roll of film.


But in this type of camera, film rolls in addition there are also magnetic tape to store the voice data.


In a 1-second shots, it takes about 30 frames the film.


The type of film used is a positive film (slides), in which to view its contents should be washed in the laboratory first film and is projected by using a special projector.


This type of camera stores images and sound data on magnetic tape.


Generally there are 2 types of cameras:


Analog (AV)


The data is stored as a stream of strong signals (waves) on the camcorder tape.


This type of camera types including VHS, S - VHS, 8mm, and Hi - 8.


Digital (DV)


Camera digital video recorder stores data in binary code format of bits per byte which consists of series 1 (on) and 0 (off).


Types of cameras include mini DV, and Digital 8.
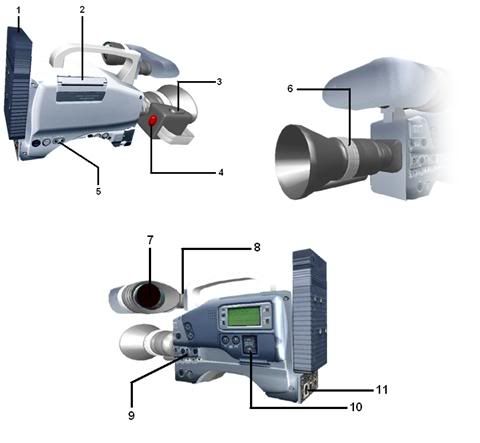

teknik-peng_gambar-1


In general, the parts consisting of a video camera:


  1. Battery for power supply

  2. lace tape

  3. Zoom

  4. Recorder button

  5. Output port video / audio (can be analog or digital)

  6. Focus Ring

  7. Preview window (View Fender)

  8. Microphone

  9. Light controls

  10. Keys Player (for playing back video).

  11. DC input terminal.


In addition there are also many additional facilities that vary between one camera with another camera.


Facilities include an infrared light for shooting in dark places, edit the text directly from the camera, the effects of other video, slow motion and much more.


Taking pictures of an object can be done in five ways:


· Bird's Eye View


Shooting technique done with a camera height above the height of the object. The result will look spacious environment and other things seem small and scattered.


· High Angle


Angle of the objects that look so impressive small objects. This technique has a dramatic impression of the value of "dwarf".


· Low Angle


Angle from the direction of the objects that look so impressive large objects. This technique has a dramatic impression of great value / prominance, authoritative, powerful, dominant.


· Eye Level


The results showed catch someone's eye view. This technique does not have a dramatic but natural impression.


· Frog Eye


Shooting angle with the height of the camera parallel to the base / bottom position of the object or lower. The result will look as if the audience's eyes represent the eyes of frogs. Image size is usually associated with shooting purposes, the level of emotions, situations and Events object. There are a variety of terms such as :


· Extreme Close Up (ECU / XCU) : the image is a very detailed look like a player's nose or lips or tip of the heel of the shoe.


· Big Close Up (BCU) : taking pictures from head to chin length.


· Close Up (CU) : images taken from close range, only part of the object that looks like just his face alone, or a pair of new shoes legs

· Medium Close Up (MCU) is similar to MS, if the object of people and taken from the chest upwards.


· Medium Shot (MS): retrieval of medium-range, if the object of it is visible only half his body alone (from the stomach / waist up).


· Knee Shot (KS): taking a picture object from head to knee.


· Full Shot (FS): the image is fully object from head to toe.


Images taken from a distance, all objects exposed to the background object.


· Medium Long Shot (MLS): images taken from a reasonable distance, so if for example there are 3 objects of the whole will be seen. If the object is a person looking from head to knee.


· Extreme Long Shot (XLS): images taken from very far distance, you'll enjoy no longer the object but the background. Thus it can be seen the position of the object to its environment.


· One Shot (1S): Taking pictures of objects.


· Two Shot (2S): taking pictures of two people.


· Three Shot (3S): taking pictures of three people.


· Group Shot (GS): the image is a group of people.


Camera movement will produce a different picture. Therefore it is distinguished by the terms as follows:


· Zoom In / Zoom Out: the camera moves away and approached the object by using the zoom button in camera.


· Panning: camera movement looked to the left and right of the tripod.


· Tilting: move camera up and down.


Tilt Up if the camera tilt up and down if the camera nodded.


· Dolly: the position of the camera on the tripod and on the basis of its wheels. In Dolly if it moves forward and Dolly Out if it moves away.


· Follow: camera movements follow a moving object.


· Crane shot: the camera movements are mounted on the crane wheels.

· Fading: change the image slowly.


If the images fade in and fade out appears if the image disappears and the cross-fade if the image 1 and 2 interchanged simultaneously.


· Framing: framing the object is in the Shot.


In the frame when entering the frame and the frame out if the exit frame.


Shooting techniques without moving the camera, so quite a moving object.


· Object moves parallel to the camera.


· Walk In: The object moved toward the camera.


· Walk Away: Objects moving away from the camera.


This technique is said because not only rely angle, image size, camera movements and objects but also other elements such as light, property and the environment. Average shooting by using these techniques produce more dramatic impression.


· Backlight Shot: shooting techniques to lighting on the object from behind.


· Reflection Shot: making techniques that are not directed to its object but from the mirror / water that can reflect the image of the object.


· Door Frame Shot: pictures taken from outside the door while the scene was in the room.


· Artificial Framing Shot: objects such as leaves or twigs placed in front of the camera so as if the object is taken from behind the branches.


· Jaws Shot: menyorotobjek camera as if surprised to see the camera.


· Framing with Background: the object of focus in front of the background but there appear so beautiful impression.


· The Secret of Foreground Framing Shot: making objects that were in front until the background so that the fusion scene.


· Tripod Transition: the camera position above the tripod and move from one object to another object rapidly.


· Artificial Hairlight: given the object hair effects of artificial light so shine and more dramatic.


· Fast Road Effect: teknikyang taken from the car was speeding.


· Walking Shot: This technique takes a picture of the current object.


Usually used to indicate who was walking in a hurry or pursued by something.


· Over Shoulder: taking pictures from behind the object, the object is usually only seen the head or shoulders only. Obtaining this to show that the object was seeing things or objects can also chatting.


· Profile Shot: if two people are in dialogue, but the shot from the side, one showing the camera first and second camera showed the second person.


Scripts serves as a guide for us in making the film, meant to guide us in taking pictures and sound.


So a script usually contains about the sequence of images that must be taken with a camera and a voice that must be recorded either in the form of narration, dialogue, music and sound effects. For convenience, (for beginners) sheet of manuscript is divided into two columns. In the left column written order of the image to be captured by the camera and an explanation of the shooting angle. So in this column can be known whether the pictures should be taken in close up, medium shot, long shot, and so on. Camera movement from left to right, top down, much to the close and so may also be written in this column. This column is called the visual field. While to the right column included narration or dialogue of the players, music, sound effects and other sounds to be recorded. In this column can be known whether the recorded voice or background of the transition and so on. This column is called an audio column.To distinguish, all information that is not voiced by uppercase, while the dialog that the player will read characters written in small letters.

Identification Program


Contains program identification information about the program or movie will be produced. Title, duration, format of the program, and others may be included in this section.


Synopsis


Synopsis or summary of the story needed to provide a brief description and dense on the theme or main story in the film overall.


Synopsis may contain the following things:


· Outline of the story.


· People protagonists.


· People antagonist.


· Important figures directly supporting the main plot and sub plots.


Problema · main and important problems-problems that were very influential in the story.


· Main motives and motifs important action helper.


· Climax and resolution


· Conclusion.


Treatment


Before the script into a screenplay it is very necessary to create treatments. Treatment is a description that describes the flow of the presentation of a film story. Somewhat different with a synopsis, treatment to try to give a brief description of deskriptis about how an episode of a story. By reading treatment we get an idea of the sequence of visual scenes that would appear on the screen. Ways of delivery in the treatment must have filmik and seplastis may be easy to imagine and to stimulate the imagination. The reader is expected to be able to imagine the scene in question.

Story Board


Storyboard is a series of images that describe the details of making a scene by scene. Normally such a scene drawn comic format. In this case no drawing skills required, which overlooked the picture can be understood and translate the scene.

Scenario


Scenario is a script that contains a story or idea that has been designed presentation, so communicative and interesting films presented by the media. Another name is the screenplay or movie script. Scenarios are operational guidance in the implementation of the shooting. In this scenario techniques have appeared and shot the full dialogue. Because the scenario is more of a working script in the field, then the description lines must too short, so quick to give understanding, and soon the movie projected on the reader's imagination.


Download Synopsis and password

Know the basics of Photoshop filters

EXTRUDE


Actually Many interesting effects effects on the Menu FILTER, one of which is Extrude. Immediately, we discuss on this page.

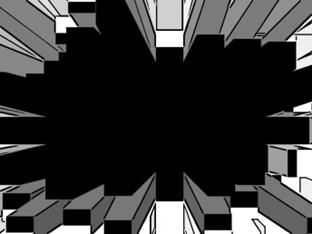
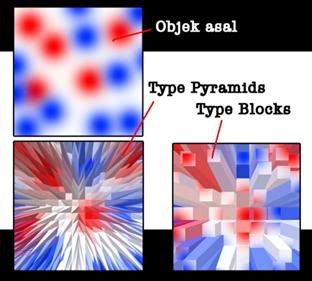
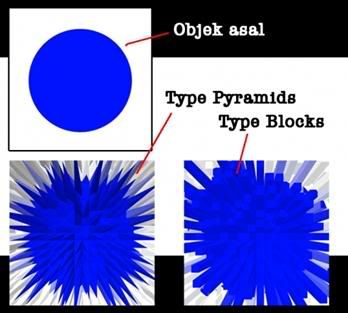
There are 2 type Extrude, namely Type Blocks and pyramids, and in this instance I use the Extrude type blocks.


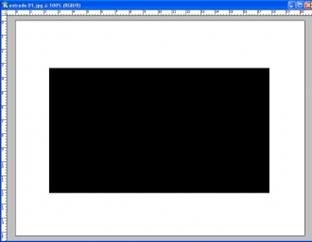
  • Create New File, the size Height: 10 cm and widht: 10 cm, resolution: 100 pixels / inch, background: White.

  • FungsiFilter3
  • In the middle of the backround, fill with black color (the way: the area used for selection with the rectangular marquee, and then given a black color)

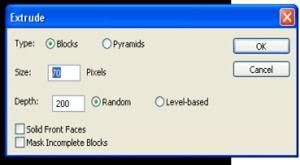
  • Select the menu Filter - Stylize - Extrude


  • On the menu / tab Extrude the set: Type: Blocks, Size: 70 pixels, Depth: 200, Check for the Random, and press OK

  • FungsiFilter4
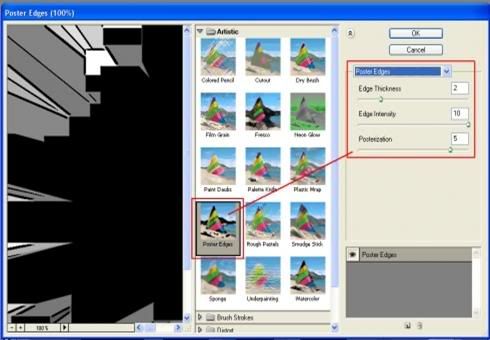
  • Add artistic effects (this time I put on a poster effect edges) contained in the menu Filter - artistic - poster edges, to further look at the picture.

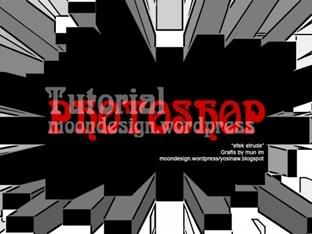
  • And see the results as shown below


  • You can also add text (of course with the creation and your own imagination) or can be also added another picture. like the example below


FungsiFilter5


Another example of the effect of Extrude


FungsiFilter5


FungsiFilter6


FungsiFilter7


FungsiFilter8


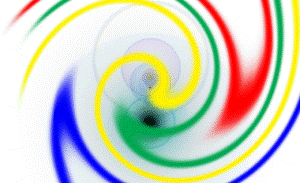
TWIRL


FungsiFilter9


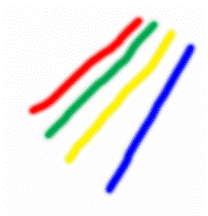
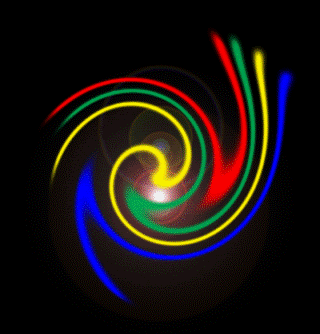
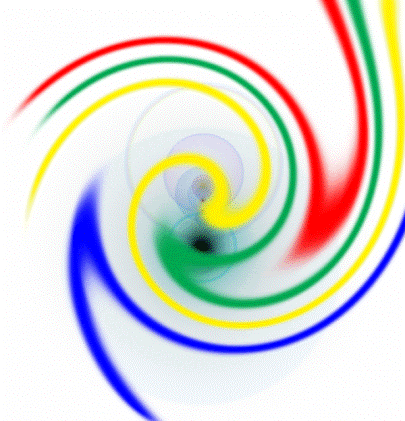
The picture above is the Twirl effect, with the basic object strip color (blue, yellow, green and red),


  • Create New File (size 10 x 10 cm) white background (white)

  • FungsiFilter10
  • Create a New Layer (Ctrl shift N), for lines with a pencil line tool with the color (blue, yellow, green and red) or maybe your favorite color match.


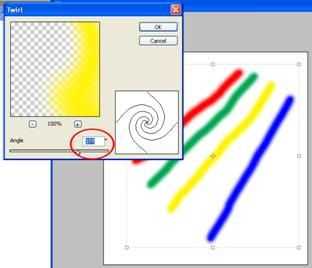
  • It is not? ... If it's just to the Filter menu - Distort - Twirl, more details, see the picture below:


FungsiFilter11

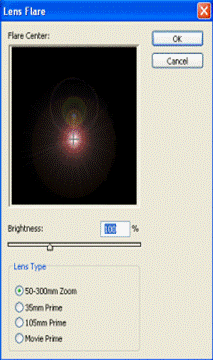
  • Now we change the background color used to be black, and we love lens flare effects (menu filter - render - lens flare). see picture again yes


FungsiFilter12


FungsiFilter13


  • After lens flare effect is complete, then we invert the background, how to press [Ctrl i] on the keyboard. Results from invert image can be viewed as the image below:


FungsiFilter14


FILTER ARTISTIK


Its function is to create an artistic impression on the image or object.


  • Open the image file.

  • Select the menu filter> artistic and select an existing filter in the artistic submenu.

  • Live set setting'nya as we want.


image below is one example of artistic filters.


FungsiFilter15


FungsiFilter16


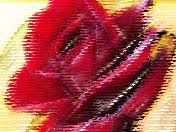
Rose Rough Pastels

FILTER BLUR


The function of this filter make obscure or blur effect on the image on the canvas. usually the photographer


  • Open the image file first. This original image


FungsiFilter17


  • menu filter> blur select one blur filter from an existing family in the Filter submenus.

  • Setting as you want.

  • Here's an example


FungsiFilter18


FILTER DISTORT


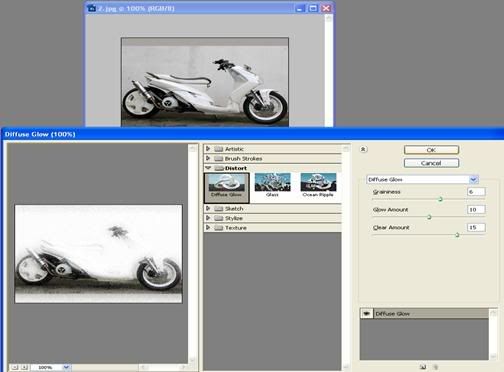
Function create distortion effects or change the orientation of photos or images.

Pace Just choose the menu Filter > Distort, and then can click on one of the choices submenunya.

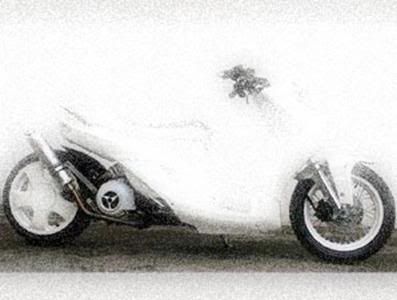
One example Distort diffuse glow

FungsiFilter19


Sample image filters (diffuse Glow)


FungsiFilter20


FILTER NOISE


Functions for creating effects of image noise or dirty or spots in the picture. Just choose the menu aja filter> noise.

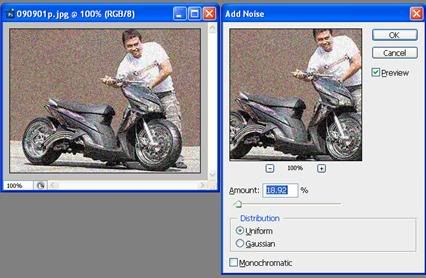
One example submenus Noise Filters Add Noise

FungsiFilter21


Set settingnya like amount: 18.92%


And set as the Uniform distributionnya OK


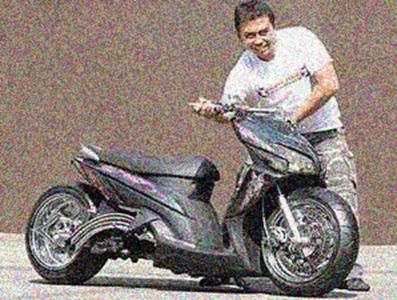
The figure below the results of the example filter - Noise Add Noise


FungsiFilter22


FILTER PIXELATE


Functions for nuance effects ciptain spots in the creation or game points.


Filter > pixelate and select one of the submenus


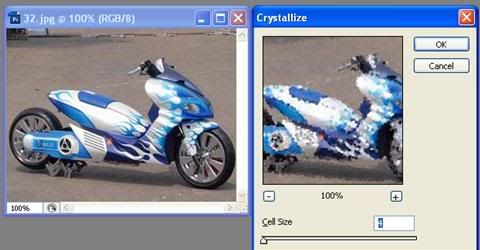
One example of filter effects crystallize Pixellate

FungsiFilter23


Set as this setting


Cell size: 4


OK


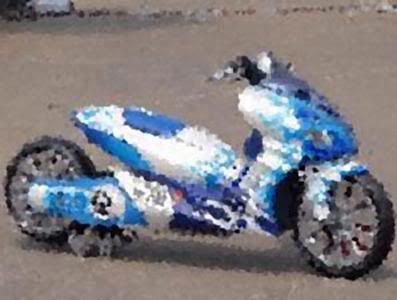
Figure below a sample of the filter effect pixellate crystallize


FungsiFilter24


FILTER RENDER


Functions for creating special effects that can not be accommodated filter other groups. Submenunya there are five, namely:


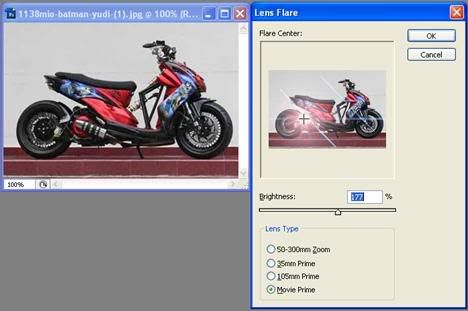
One example of filter effects Render Lens Flare


Lens flares to give the effect of light reflection in the camera lens.


FungsiFilter25


setting like:


Brightness: 177%


By lens type: Movie Prime


Ok ...


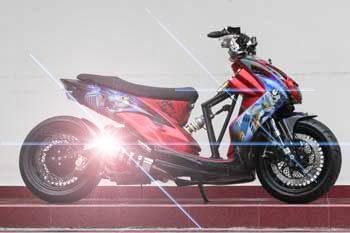
The figure below one example of effet Render Lens Flare Filter


FungsiFilter26

clouds for creating texture on the canvas, so if there's a picture there, all images are covered by this texture, but if you lower the intensity of the filter.

Difference clouds to provide shade effects fog.

Fibers like difference clouds, but it will look like fiber (fiber).

Lighting effect to regulate lighting.

How to select the filter, only click menu filter > rendering.


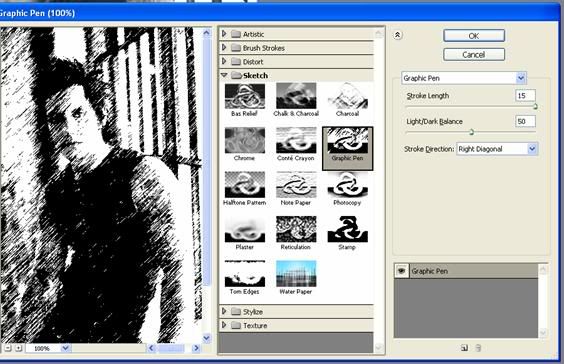
Filter Sketch


Its function is to create the impression that the effect of the sketch on the canvas. Here's an example of this filter pake.


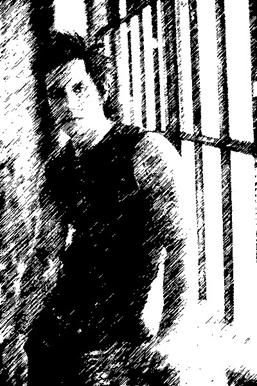
Figure below is the result of the filter effect Graphic Sketch Pen


FungsiFilter27


setting, then Ok


Thumbnail image Graphic Pen effect


FungsiFilter28

Filter Stylize


Its function is to create effects that would be a more unique photos.

FungsiFilter29


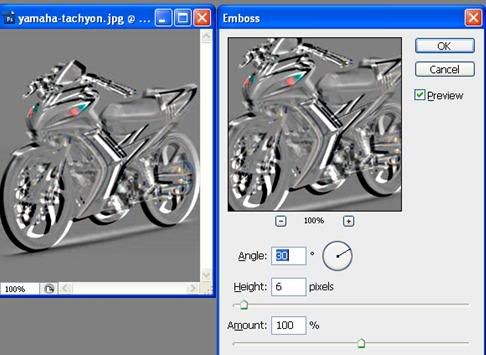
Emboss filter Stylze object will give effect arises


Set settingnya like:


Angle: 30o


Height: 6 pixels


Amount: 100%


OK


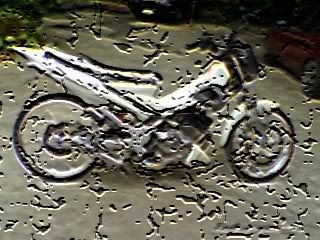
Figure below Stylize Emboss filter results


FungsiFilter30


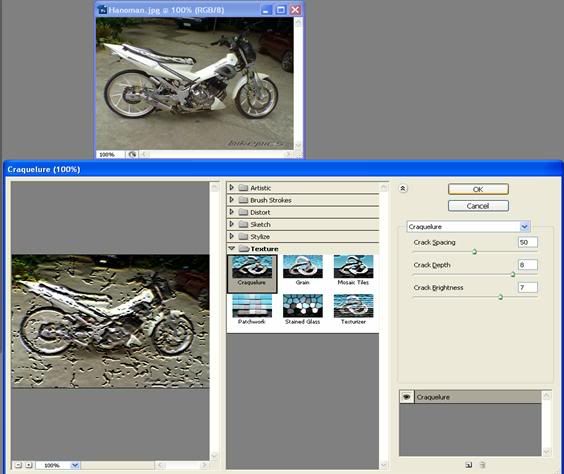
Filter Texture


Its function is to create the impression that the effect of textures on photos or drawings. Only by choosing Filter> texture.

FungsiFilter31


One of the texture using filter effect:


Set settingannya first, such as:


Crack Spacing : 50


Crack Depth : 8


Crack Brightness : 7


One example of filter effects Texture:


FungsiFilter32


Filter Others

Functions for very specific purposes. Select the menu filter> others.


One Others Custom filter effect


Custom is used to adjust the light object (picture).


FungsiFilter33


Setting Set dialog box as shown above, according to your image

Friday, December 4, 2009

Audio Player

Audio Player

Audio Player is supporting us when we listen to music, format mp3, wav, mp4 or other, which is still a lot of formats for ekestensi an audio formatted.

one of them is jetAudio, Audio Player is different from the others, because many of its features are not shared by most of the other player, for more details see
here.

JIf you want to have this software could be in line here , jetAudio7_PLUS_VX_u, here

JetAudio 7.5.3 Basic for free to the line here


Another Audio Player for playing audio files formatted:


1. Ace Media Player

A single media player software can be used to watch video files formats such as QuickTime, Real, DivX and Windows Media files.

2. ALShow Media Player

This software has inbuilt support for the code that files play FLV and MP4 format.

3. BS.Player

BS.Player is one of the video player known for memmerlukan CPU and RAM requirements are low and a lot of ability and complete. BS.Player user in the world has reached more than 60juta users around the world and is supported on more than 90 languages.

4. Core Media Player

Player media software that can play DVDs with stable and with a simple interface but has full features. This software is right for your DVD player instead.

5. Crystal Reality

These programs work well on a variety of versions of windows platform. This program also features a video playback to play the video, a simple feature that is needed but sometimes forgotten in the software other big name.

6. FLV Player

Software developed by software provider well known torrent client is a media player for flash videos downloaded from your usual websites such as YouTube, Google Video and so on, with a playback feature.

7. GOM Player

This software name stands Gretech Media Player, has more ability to play files berekstensi. Flv files and other formats without needing a codec.

8. jetAudio

This multimedia player software has more features like the ability to rip CDs, encode or change the audio files and video and recording.

9. Kantaris

Kantaris is based on source code VideoLAN client (VLC) and most can play various types of files, audio & video CDs and DVDs. Kantaris is compatible or suitable for all versions of windows.

10. LAVA FLV Player

This player can play various video files downloaded from Google Video, Youtube, Metacafe and others, such as flv player from BitComet.

11. Media Center

This multimedia software has a jukebox style media player with a similar interface to iTunes that can be organized and played various types of media files.

12. Quintessential Player

Windows media player supports many popular audio formats with features such as streaming Internet radio and CD ripping.

13. RadLight

RadLight is a first type of multimedia player that supports various formats like DivX, DVD, MP4 audio to Mp3 format.

14. The KMPlayer

This dynamic multimedia player capable of playing all audio and video formats, including display subtitles, capturing the media and create a screenshot from the video.

15. VidLizard
Player audio, video and DVD for windows has an easy to use interface and an optional control panel for easy screenplay.
All platforms (Linux, Windows, Mac OS, etc)

16. MPlayer)

Program open source media player is compatible with windows, linux, Mac, etc.. with similar features such as WinAmp.

17. Totem

Open Source Media Player for the GNOME desktop environment features additional functionality such as webcam utilities, video thumbnailer and firefox plugin.

18. Zoom Player

Zoom Player is a media player that can be customized to have the support of media formats to date.


Others


19. CorePlayer

CorePlayer is a multimedia player platform with features that help users to create multimedia content for mobile phones, PDAs, GPS or other mobile gadgets.

20. Xbox Media Center

This software is a multimedia player for the Xbox game console, which features in other andtara, able to play music, view pictures and video playback.

Ordering templates are suitable for your Blog!!!

Ordering templates are suitable for your Blog!!!

Are you want to use templates to fit your theme, just right and fit for our blog and easy fit in the heart ...

the design You can make yourself in photoshop or give some information to the I to work on a template that match your blog ...

hehehe ... I asked many kok ga, a small play once it is in accordance with the level of difficulty of the template in the message ... gimana kalo Rp. 50,000 or more ?!?

're on site most of the toys used dollars $ all, ($ 62.2, $ 99) waduh reply dirupiahkan how ya?!?, and also still can nego ... hehehe ...
Kalo

willing to learn, can also learn online kok create templates via online chat on facebook ...

but I do not know how the online payment through a bank or whatever his name is, so is still valid for the bloggers mania especially around Singaraja Bali ...

But all this is still for bloggers, to other blog hosting that I'd never pelajarin, hehehe

Wednesday, December 2, 2009

Tell your story to be Song


I was the person who is not hypocritical to life, whatever will I tell you, and pour while sad, angry and happy, I always pour it in a song lyric that kujadikan to excite emotion lyric-lyric which can be heard every time.

The stories that I make in the song, everyone is a true story where a lot of feedback that I got from friends, friends and community around ...
Perhaps the critical

song, but every person belongs to each of us, how we can digest and interpret what I wrote in the song I was. This is art and art sometimes it is crazy, but the madness of art I do, not simply to drag the relevant Personal and feel taxable sarcastically to-lyric lyric that I wrote, maybe this song can you menggunggah song for a bit to clean up the error - errors that may inadvertently, and perhaps we make when listening to this song your heart could laugh and can better digest the contents of the lyric-lyric.
Here

I did not make themselves known or famous, because I never felt pressured to make the song even though music is the music I used others and this is the form of honesty I am.

I will not stop working until here, because my soul and the Art nafasku although I could only chant through the song I just hope you can accept and interpret the song.

Tell your story with honesty and maybe if the parties we feel fit and suitable for making a song. Let us share our story to the world.

From We will not reverse happened even a little, and we will try to improvise and menembangkan all honesty though the music other people ...

Contact We are in:

Able directly to Mahesa : os_mahesa@rocketmail.com atau 081936415000

or with Admin, yein59@gmail.com , yein59@yahoo.com , yana.yein8@gmail.com

Facebook Mahesa os_mahesa@rocketmail.com dan admin yein59@yahoo.com


There purpose of what I wrote just want to entertain the World according to the story of you ...

Good Trying !!!


Design Cover CD


Have you seen ?!?

Cover / Skin from the favorite CD from your home ?!?


aim to:


  1. Make More beautifull

  2. For us to know what the contents of the CD

  3. Showing label maker

  4. and many others, hahaha


How to make :


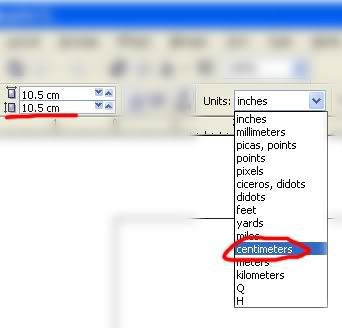
Start work, and the first thing to consider is: set ruler units of measure and in CorelDraw by looking at the Properties panel (Docker properties) we use in units of centimeters (inches)


CD has a diameter of 12 cm, but now we reduce the size to fit when placed on a CD that has been filled content.


size for length and width: 10.5 cm


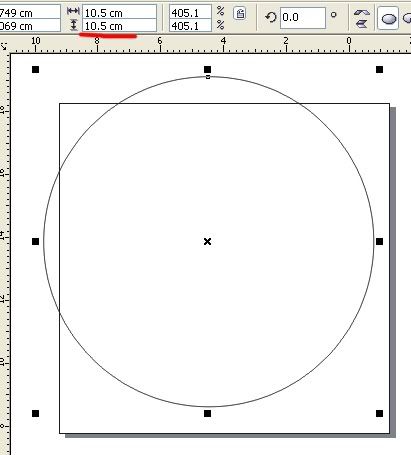
the first object that we make a circle and make use Ellipse tool.


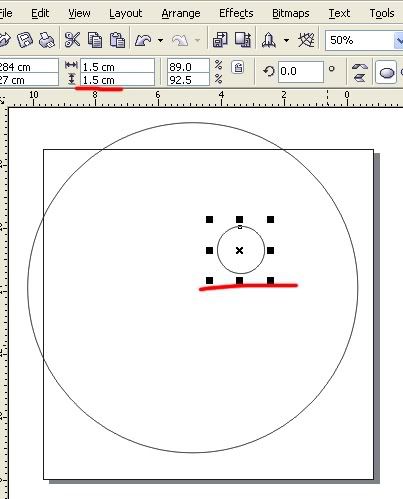
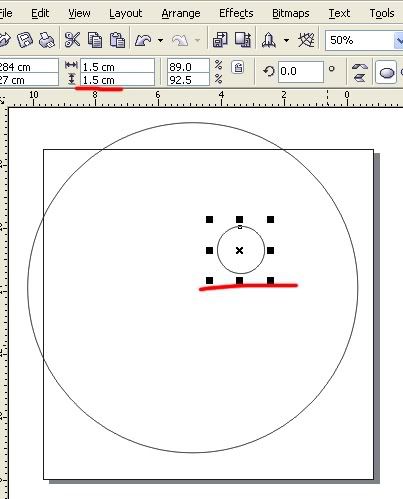
length and width of order objects according to desire, menengoklah at Docker / properties panel (shown in the image above). set the length and width 10.5 cm.


Create another circle of objects, and again we look Docker / long, adjust the properties panel and 1.5 cm wide.


We will often look at Docker / panel properties so do not be tired to see there, hahaha

to flatten the object, use the Align and Distribute facility on the panel / Docker properties
Please be sure both objects selected, then activate the Align and Distribute window, select the Distribute Vertical: Center, Horizontal: center and Distribute to: Extent of Page and Apply (see picture)


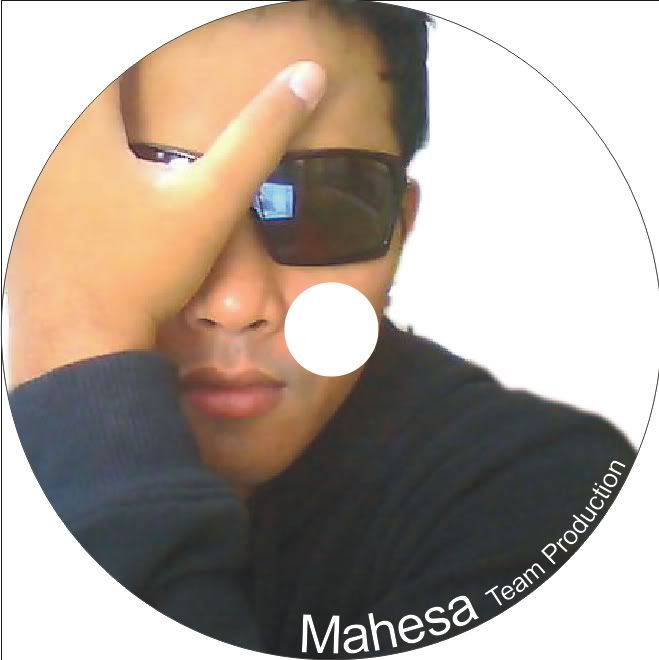
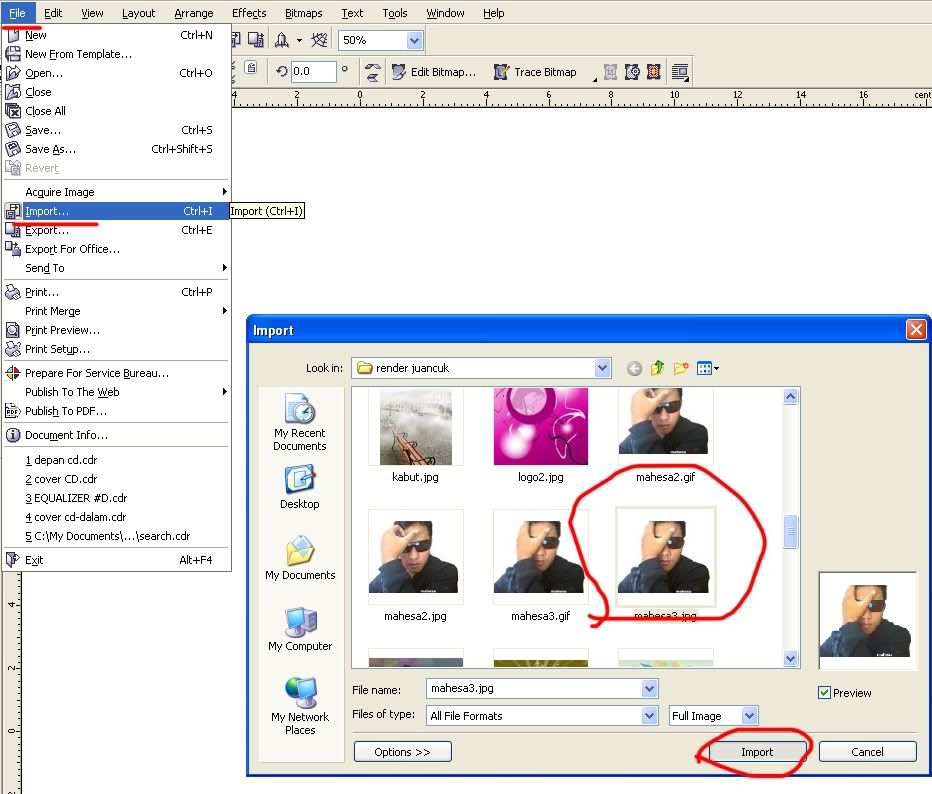
Begin to import an image that will be put into the middle of the CD, I use the example of our first gatra "Bli Mahes"


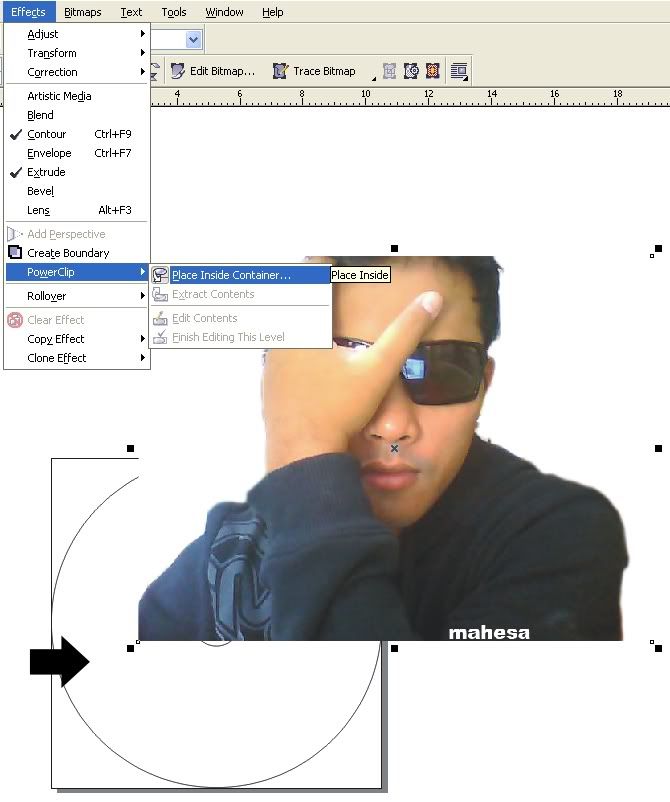
Well now place objects in the middle of the circle, make sure the image just import selected.

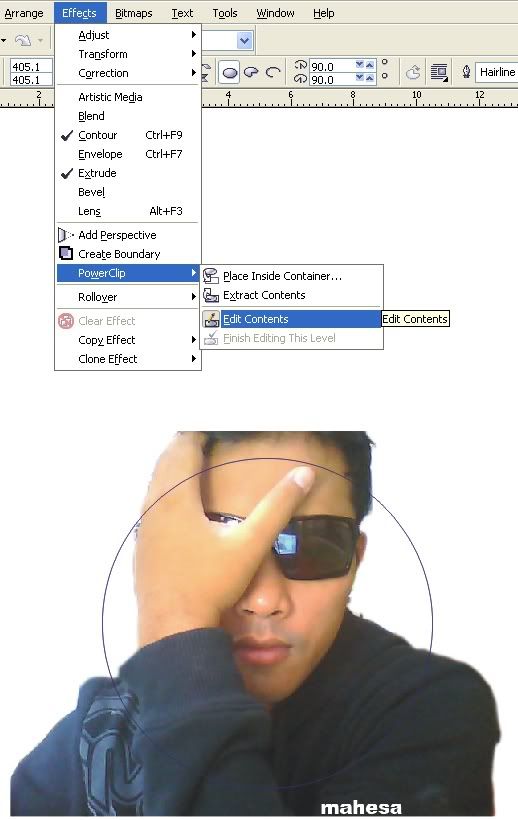
Effects> Powerclip> Place Inside Container.


Surely satisfactory results have not been ...


Back to the Effects menu > Powerclip > Edit Contents.


Set size / position of this import images. if it is returned to the Effects menu > Powerclip > Finish Editing this level.


Addition Text:


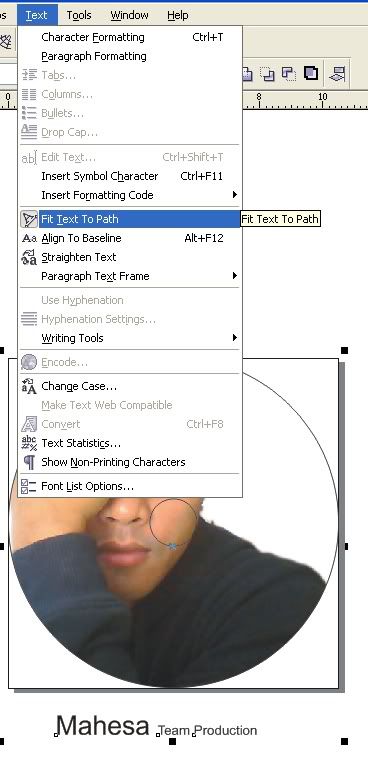
Add text, such examples: Mahesa Production Team, with sizes up to us.


Then selection and circle text objects that contain images, then select the menu Text> Fit Text to Path.


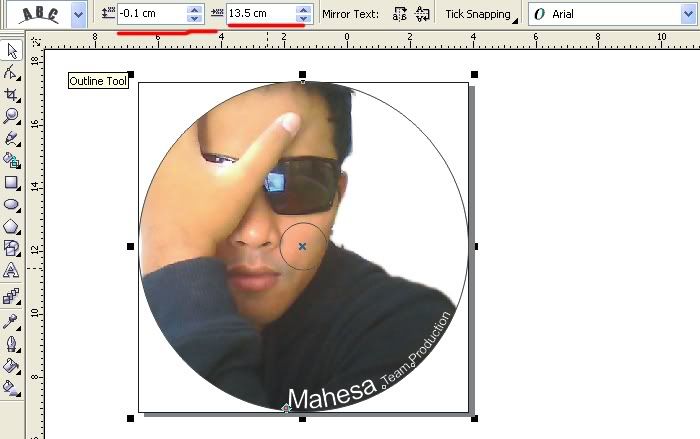
Selection text look back panels / Docker properties (see the figure) set the text position attached to the circle and give the text with white color (because backgroundnya almost black, so that the text visible) content values, respectively: -0 , 1 cm and 13.5 cm [not setting absolute].


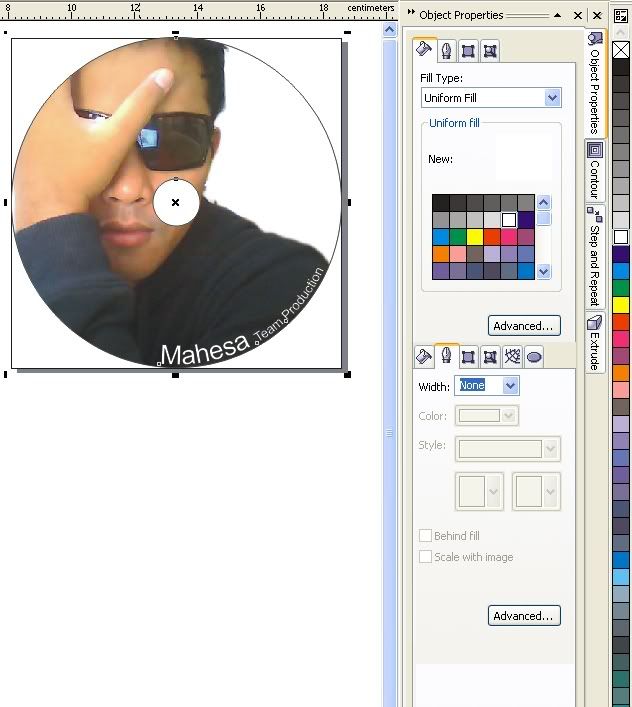
Finally, selection of a smaller circle and white berries and remove the line (see picture).


If anyone have a better idea Please give a comment to this artikel, or maybe the article is less complete tutorial or something is wrong ... Forgiving me, hehe, and do not forget to comment, ok ...!!!


CopyRights Narayana Yein dengan coding template dari kendhin's blog, Narayana yein 2009. Hosting by 000webhost and domain from www.co.cc