

Although vector drawing application, you can still play with 3D images. Yes, this application can be used to make three dimensional images of objects in the drawing process. This can be used to make three dimensional images of objects in the drawing process. This is thanks to the presence of the facility "Extrude Tool" which makes the 3D image creation process easier.
to try it, you can follow the guide to make 3D images of music equalizer following CorelDRAW. The same tool you can apply to other objects such as text, for example. To create 3D text like a Superman comic book titles.
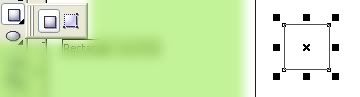
- Equalizer is a composition of colored boxes that usually appears in amplifier devices. To start it, make a box with [Rectangle Tool]. Click-drag the pointer while pressing [Ctrl] to form a rectangle the same side.
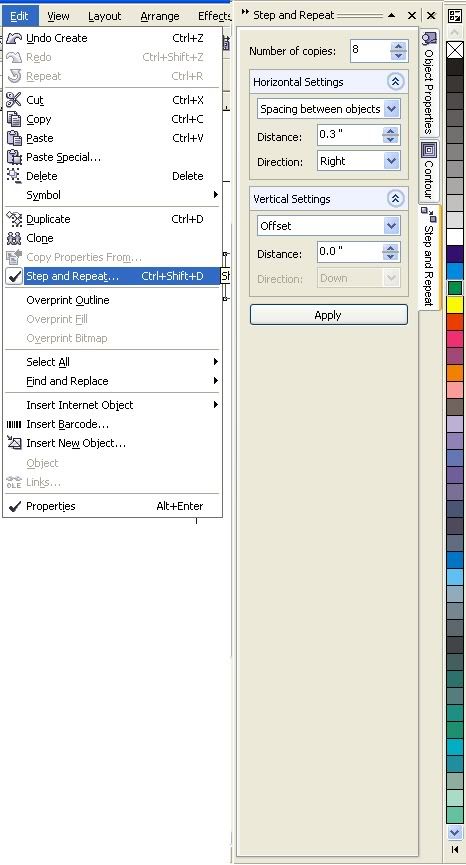
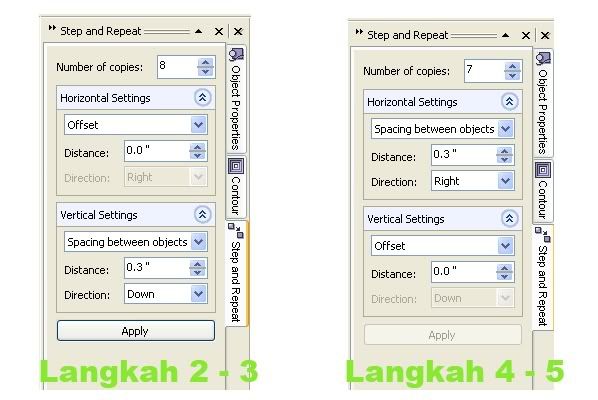
- To create a line box, click the [Edit]> [Step and Repeat ...]. Step and Repeat Docker will appear. Draw a vertical line of the box. Fill in the box to make the box "Number of copies:". In the "Horizontal Settings", select [offset], and fill the box "Distance" with 0.0.
- In "Vertical Settings", select [spacing Between Objects], and fill the distance between the box number in the "Distance". Here, the value of optional 0.3-inch distance. Next, click [Apply]. Then a new box, a number of values that have been dumasukkan to "Number of copies", will appear.
- Selection of all boxes with click and drag the pointer around the board. Create horizontal rows of boxes. Select [offset] and fill 0.0 on "Distance" in the "Vertical Settings". Select [Spacing Between Objects] and fill in boxes 0.3 spacing in "Distance" in the "Horizontal Settings".
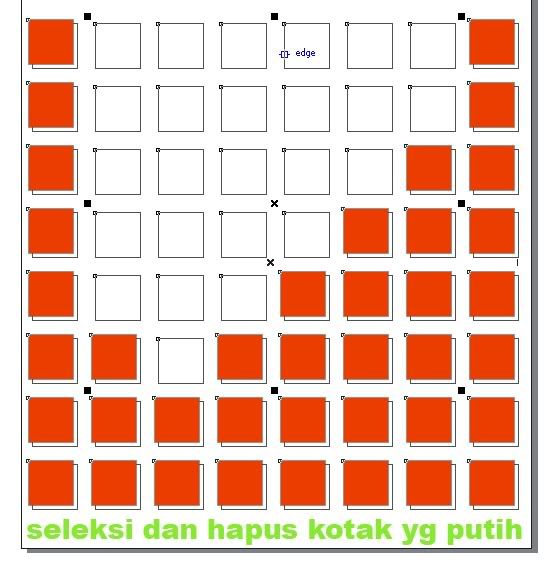
- Fill in the number of duplications in the box "Number of copies:", and then [Apply]. Range box will appear.
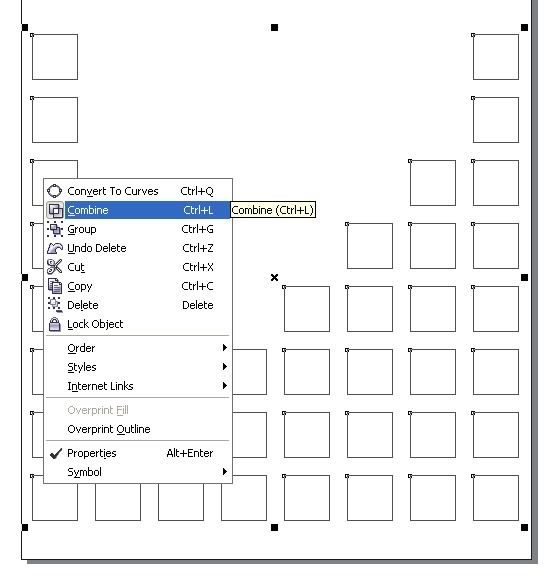
- Range equalizer box is not always the same height, then remove some of the box by clicking on it, then press [Delete]. Selection of the box, right-click the box, and select [Combine].
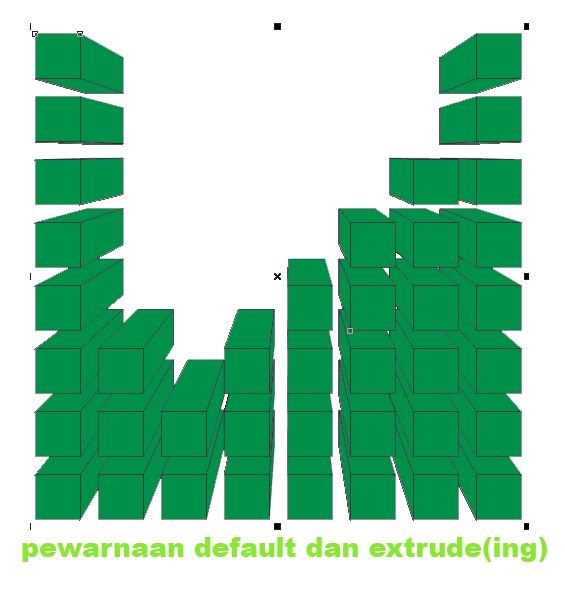
- Show 3D effects. Click [Extrude] in the toolbox. Click on the center line of the box, and then while pressing the [Ctrl], click the pointer to the bottom. Three-dimensional view now emerged. Try color by clicking one of the colors in the color palette.
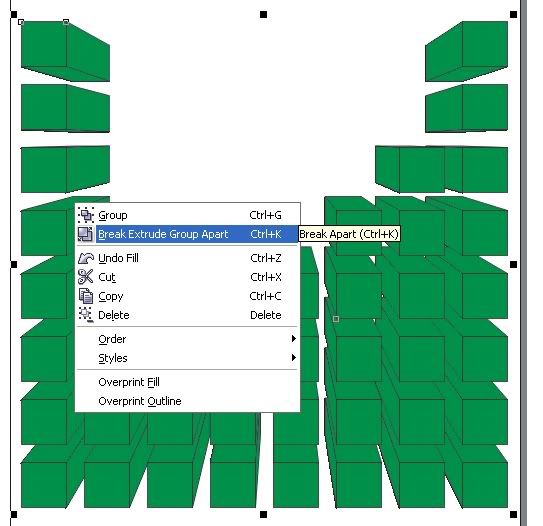
- To start coloring, click on [Pick Tool]. Click the line of the box, then select [Arrange]> [Break Apart Extrude Group], or press [Ctrl] + [K]. Right-click on the box, then select [Break Curve Apart]. Selection of a single vertical line of the box, be from the left or right.
- Select a color for the range of color palettes to the right of the application window. Next give the color one by one until the end. Selection of all the boxes, then click [Click] + [G]. You can type in text to enhance this design.
This certainly making only efect 3D tutorial basic, you can further develop their own techniques of the above.
What is certain before I render a lot sorry if something is missing ... hehehe


0 comments:
Post a Comment