Sunday, November 29, 2009

Modification ReadMore ...

used Read More ... or in the Indonesian language Read more ... often presented in the form of text ...

nha now we try to show in the form of images ... Yesh gmana ?!?

Find this code From your template <p> <data:post.body/> </p>.

first, don't forget the expand the contents from your templates, ok ... let we see the code ...

the script me examples of people on the blog, but forgot where, for I save the notepad ...

This script basically ... :

<b:if cond='data:blog.pageType == "item"'>

<style>.fullpost{display:inline;}</style>

<p><data:post.body/></p>

<b:else/>

<style>.fullpost{display:none;}</style>

<p><data:post.body/></p>

<a expr:href='data:post.url'>Read More... </a>

in the text Read More that we modifications ...

Replace with this script:

<img src="read more.gif" width="300" height="100" />

The green color is the URL where you place the image.

The Dark blue color is the size width and height of the image you have, it must fit together let no corrupt image resolution pictures ...

Of particular interest, background color pictures of his image ( read more ) ... if You have a template which have many gradient color... it would make trouble ... I suggest the picture is formatted .gif or .png... the background must be deleted... or read the first article on this one ... Mendesign Read More ...

Saturday, November 28, 2009

Create 3d Equalizer Music with CorelDRAW


Although vector drawing application, you can still play with 3D images. Yes, this application can be used to make three dimensional images of objects in the drawing process. This can be used to make three dimensional images of objects in the drawing process. This is thanks to the presence of the facility "Extrude Tool" which makes the 3D image creation process easier.

to try it, you can follow the guide to make 3D images of music equalizer following CorelDRAW. The same tool you can apply to other objects such as text, for example. To create 3D text like a Superman comic book titles.


  1. Equalizer is a composition of colored boxes that usually appears in amplifier devices. To start it, make a box with [Rectangle Tool]. Click-drag the pointer while pressing [Ctrl] to form a rectangle the same side.
  2. To create a line box, click the [Edit]> [Step and Repeat ...]. Step and Repeat Docker will appear. Draw a vertical line of the box. Fill in the box to make the box "Number of copies:". In the "Horizontal Settings", select [offset], and fill the box "Distance" with 0.0.
  3. In "Vertical Settings", select [spacing Between Objects], and fill the distance between the box number in the "Distance". Here, the value of optional 0.3-inch distance. Next, click [Apply]. Then a new box, a number of values that have been dumasukkan to "Number of copies", will appear.
  4. Selection of all boxes with click and drag the pointer around the board. Create horizontal rows of boxes. Select [offset] and fill 0.0 on "Distance" in the "Vertical Settings". Select [Spacing Between Objects] and fill in boxes 0.3 spacing in "Distance" in the "Horizontal Settings".
  5. Fill in the number of duplications in the box "Number of copies:", and then [Apply]. Range box will appear.
  6. Range equalizer box is not always the same height, then remove some of the box by clicking on it, then press [Delete]. Selection of the box, right-click the box, and select [Combine].
  7. Show 3D effects. Click [Extrude] in the toolbox. Click on the center line of the box, and then while pressing the [Ctrl], click the pointer to the bottom. Three-dimensional view now emerged. Try color by clicking one of the colors in the color palette.
  8. To start coloring, click on [Pick Tool]. Click the line of the box, then select [Arrange]> [Break Apart Extrude Group], or press [Ctrl] + [K]. Right-click on the box, then select [Break Curve Apart]. Selection of a single vertical line of the box, be from the left or right.
  9. Select a color for the range of color palettes to the right of the application window. Next give the color one by one until the end. Selection of all the boxes, then click [Click] + [G]. You can type in text to enhance this design.

This certainly making only efect 3D tutorial basic, you can further develop their own techniques of the above.


What is certain before I render a lot sorry if something is missing ... hehehe


TIPS SEO !!!


SEO stands for Search Engine Optimization, which means doing optimization blog to display on the main page / pages on the search engines when someone types a word search on the search engine box. The process is the one to open search engines Google, Yahoo, and MSN, and it will type in search words in the search engine box and then will display the page list includes Blog-Blog that match the search word is typed that person.


Beberapa TIPS SEO dari saya :


Content:The contents of the Blog You have to load a lot of keyword searches in accordance with the targeted search keywords. Search keywords are the words typed by Internet users to its search engine in finding the information he wants. In the example above the search keywords author is an Internet business, online business, business
Indonesia internet, internet business in Indonesia, Indonesia online business and online business in Indonesia.


Back Link:
back link is a link blog you are shown on the blog someone else. Quality back links can affect page rank (rank) Blog You, the higher the page rank the search engines you rate this blog contains content (content) quality blog to display the search results. Quality back links are from blog to put a link to your blog's.


Domain:
In the election of a domain name you the first time, try to have keywords
(keyword search) on the domain name you.


Title dan Metatags:
Blog belongs to You, You need to make a title and meta tags that contain the search keywords that you aim at. To make the code title and meta tags you can use


Sitemaps: sitemaps is a page that displays a map link on the Blog You, sitemaps ease of search engine spiders to navigate blog content and update you of any changes that occur in the Blog You're on the database search engine. To create sitemaps You can use the http://www.xml-sitemaps.com/ or others


Natural Listing: natural listing an activity you register on Blog search engine. There are 4 pieces main directory search engine where you can register your blog.


- Google.com
http://www.google.com/addurl

- Yahoo.com
http://www.submit.search.yahoo.com

- MSN.com
http://search.msn.com.sg/docs/submit.aspx

- Dmoz.org
http://www.dmoz.org


And many more other search engine directory.


Additionally, each of us try to write a lot of posts related articles ... hahaha this is what I apply on my own Blog Bali di Mataku


Friday, November 27, 2009

hidden multiple objek with tabs


Many articles related to this article, including : Hidden object with tab, Make a tab for hidden object, Make hidden object, Multiple hidden object and CSS, Nha Everything you need to understand ..

Next.... ( Chapter II Discussion )


CSS


#gb{

position:fixed;

top:50px;

z-index:+1000;

}

#gb2{

position:fixed;

top:170px;

z-index:+1001;

}

* html #gb, * html #gb2{position:relative;}

.gbtab{

height:100px;

width:30px;

float:left;

cursor:pointer;

background:url('images/tabs-ani.gif') no-repeat;

}

.gbtab2{

height:100px;

width:30px;

float:left;

cursor:pointer;

background:url('images/tabsjadi1.gif') no-repeat;

}

.gbcontent{

float:left;

border:2px solid #ff0000;

background:#F5F5F5;

padding:10px;

}

.gbcontent2{

float:left;

border:2px solid #000000;

background:#F5F5F5;

padding:10px;

}


to keep in mind ... is a text color other than the above CSS code


red : menunjukkan adalah bagian milik tab yang ke 2


purple: border color on the tab should be adjusted to 2 with the tab you're using

dark green : url of the image that you use the tab, try to be uploaded intoPhotobucket.com


blue : position / distance to the 2nd tab: 170px from the top


lilac ( light purple ): z-index that layer, so it must be added value is +1001 let 1 level of the first tab.


Body


<!-- Hidden 2 -->

<script type="text/javascript">

function showHideGB2(){

var gb2 = document.getElementById("gb2");

var w2 = gb2.offsetWidth;

gb2.opened ? moveGB2(0, 30-w2) : moveGB2(20-w2, 0)

gb2.opened = !gb2.opened;

}

function moveGB2(x0, xf){

var gb2 = document.getElementById("gb2");

var dx2 = Math.abs(x0-xf) > 10 ? 5 : 1;

var dir2 = xf>x0 ? 1 : -1;

var x = x0 + dx2 * dir2;

gb2.style.right = x.toString() + "px";

if(x0!=xf){setTimeout("moveGB2("+x+", "+xf+")", 10);}

}

</script>

<div id="gb2">

<div class="gbtab2" onclick="showHideGB2()"> </div>

<div class="gbcontent2">

<div style="float:left;width:100%">

<div style="float:left;"><h3 style="margin:0px">Title</h3></div>

<div style="float:right;"><a href="javascript:showHideGB2()" style="text-decoration:none">[x]</a>

</div>

</div>

<br><br>


Kuda Bodho

<br>

<br>

<a href="http://balidimataku.blogspot.com">Get Hidden Floating Objek</a></div>

</div>

<script type="text/javascript">

var gb2 = document.getElementById("gb2");

gb2.style.right = (30-gb2.offsetWidth).toString() + "px";

</script></div></div>


Code above is part of code to the 2nd tab, which was just downloaded via the link below ...


Final Source code HTML dan di Berblogging ria di Blogger and also password


untuk penjelasannya hampir sama seperti postingan yang Multiple hidden object

Multiple Hidden Object


Want to know how to make it, it previously had been made hidden objek, nha.. This article only friend here is hiding so much, it's gone !!!... weleh weleh !!!... soon we try ... hahaha


Parts that need attention, even asin the HTML or Berblogging ria di Blogger is:


#gb2{

position:fixed;

top:50px;

z-index:+1001;

}

*html #gb2{
position:relative;}

.gbcontent{

float:left;

border:2px solid #A5BD51;

background:#F5F5F5;

padding:10px;

}


We need to create a new wrapper, it isid gb2 if you do not know which is which id and class, read this first CSS


and then in the JavaScript...


<script type="text/javascript">

function aboutMe(){

var gb2 = document.getElementById("gb2");

var w2 = gb2.offsetWidth;

gb2.opened ? moveGB2(0, 0-w2) : moveGB2(0-w2, 0)

gb2.opened = !gb2.opened;

}

function moveGB2(x0, xf){

var gb2 = document.getElementById("gb2");

var dx2 = Math.abs(x0-xf) > 15 ? 10 : 1;

var dir2 = xf>x0 ? 1 : -1;

var x = x0 + dx2 * dir2;

gb2.style.right = x.toString() + "px";

if(x0!=xf){setTimeout("moveGB2("+x+", "+xf+")", 10);}

}

</script>

<div id="gb2">

<div class="gbcontent">

Kuda Bodoh<br />

Kuda Bodoh<br />

Kuda Bodoh<br />

Kuda Bodoh<br />

Kuda Bodoh<br />

Kuda Bodoh<br />

</div>

</div>

</div>

<script type="text/javascript">

var gb2 = document.getElementById("gb2");

gb2.style.right = (-50-gb.offsetWidth).toString() + "px";

</script>

</div></div>


The red print that would be added, I use a number 2 agar mudah jika mau tambah objek sembunyinya...terus kan ada : [ function aboutMe(){ ], aboutme writing can be replaced up to but not weird and do not forget the writing, because it was related when we call through menubar button later ...


nah the color purple initial position, normally he would quarrel with the first object so Hiden - 50'll need to add much to the right objects to an invisible page, if still looking to add value to be -100 so, (maybe)


Let not this confused script code that would in HTML and this is the Berbloging ria di Blogger dan juga the password


Buat yang di Blogger kalo masih ga ngerti ?!?, comment lewat shoutmix ya...


Atau mau coba Objek Hidden yang Pakai TAB, tapi yang pasti harus baca 2 artikel ini dulu, yang Objek tersembunyi dengan Tab dan yang Membuat Tab untuk Objek Tersembunyi


kalo ada yang salah dimaafin plus di comment ke shoutmix atau di form comment artikelnya ya... Makasih sebelumnya...


Thursday, November 26, 2009

Make a tab for hidden object


Previously you've ever made Hidden objek with tab, nah... This tutorial to make it the TAB.


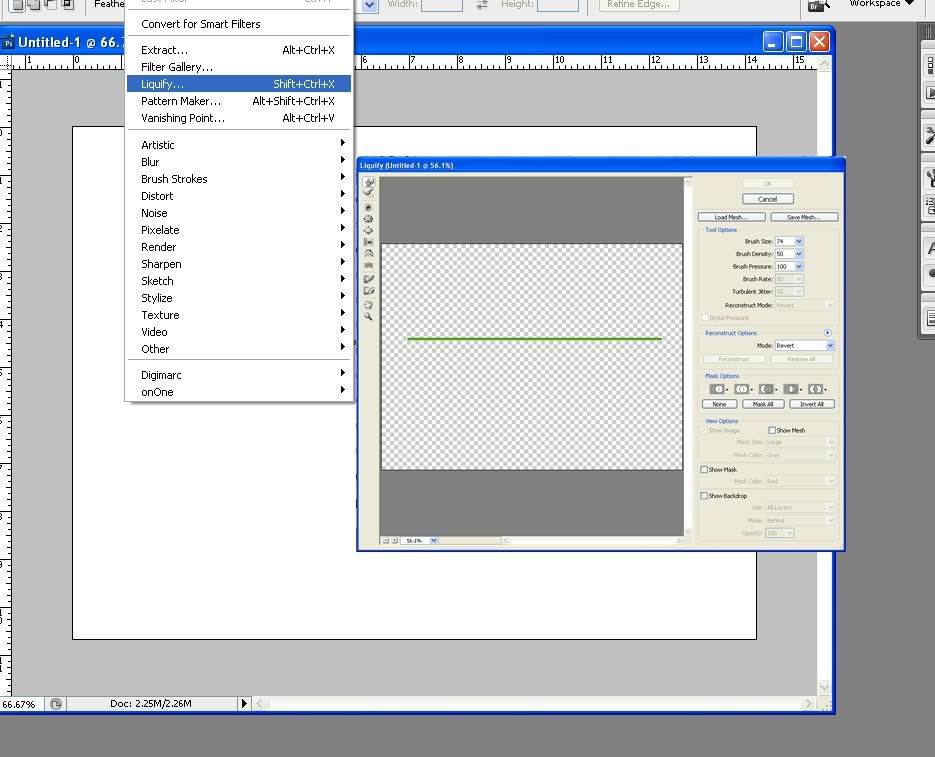
First open up Photoshop CS3 program, if you use adobe photoshop CS2 you still have to use ImageReady.


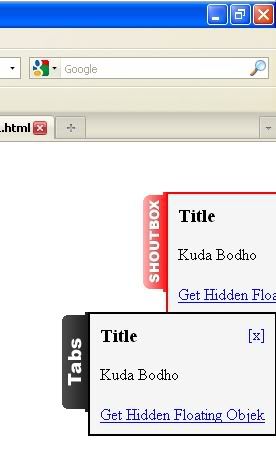
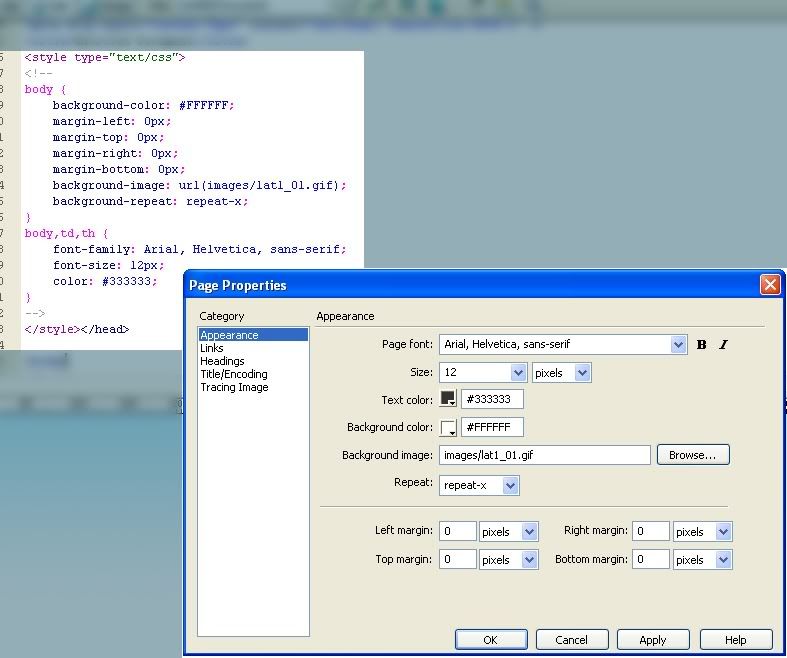
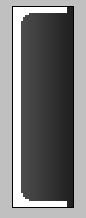
again before you have to read Hidden objek with tab, in the CSS, for class "gbtab" the height : 100px and the width : 30px.


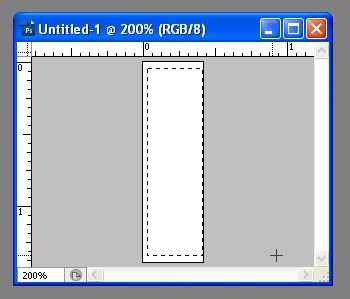
So now make a width Canvas size :30px and height : 100px.


and starting to make.... ( jeng jeng jeng !!!)


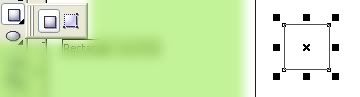
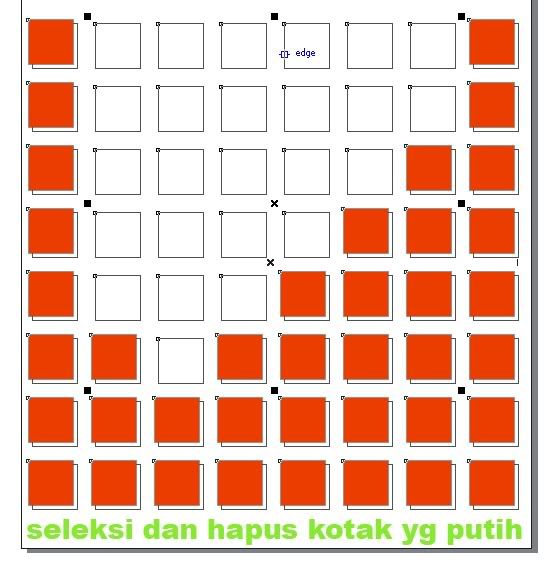
Use the Rectangular Marquee Tool to create a selection box


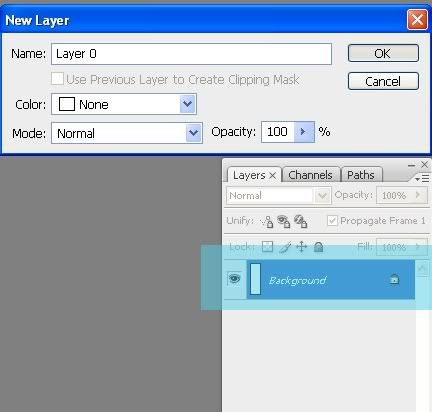
Double click on the background layer to a layer that we can edit


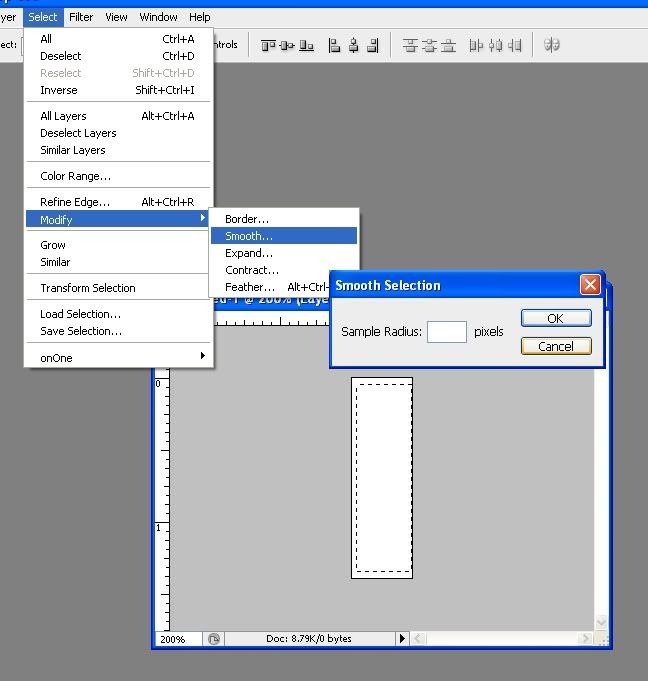
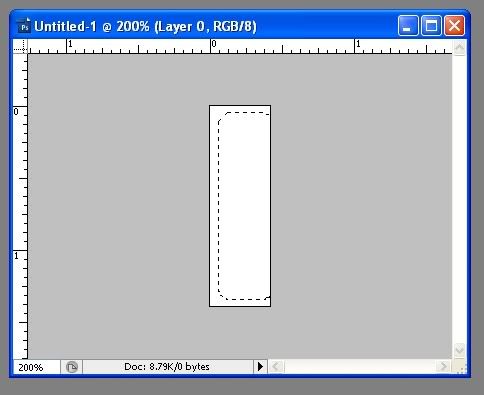
puree the end of selection or change shape to rounded menu by click [Select] and [Modify] [Smooth ... ] Give the value of Sample 4 pixels radius and OK!


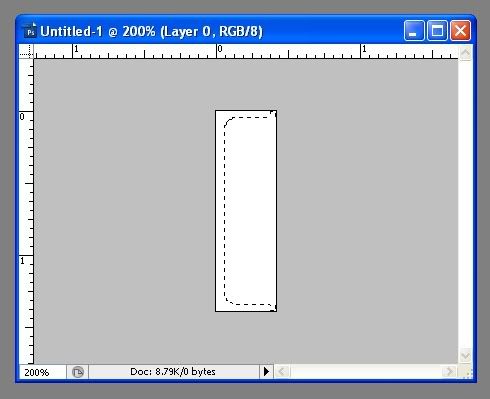
after a selection, use the Magic Wand selection tool to shift slightly to the right to activate the Magic Wand tool and use the right button set to taste you ...


add in base selection using Rectangular Marquee tool.


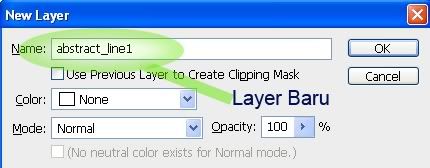
Create a new layer by pressing the combination of CTRL + SHIFT + N and give a black color # 000000 or up to you.


Let the selection and create a new layer once again, and then use the Gradient tool to make sure the foreground color gradations to white # FFFFFF with a linear gradient type and type of foreground to transparent gradient ... until the results as follows:


Create text up to you, so let the text horizontally or vertically perpendicular to press the combination of CTRL + T then right click select Rotate 90 o CCW all set position to the middle ... then in a way rasterize menu click Layer > Rasterize > Type


Remove layer 0,, and now we begin to add a little sweetener ( ciahhhhh!!! hahaha sweetener ?!? )...


Animation


Click Window menu and select Animation ... to appear palette...


Duplicate this layer by way of text CTRL + J, then double click on the layer thumbnail to appear Blending Options dialog box.


add Glow outer effects, see the figure below:


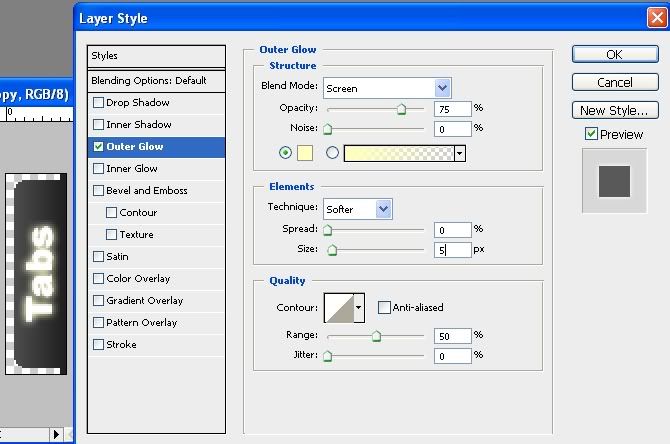
Duplicate again the current layer, repeat this step to edit effects and add outer Glow spread values: 5 and size: 15, OK


Began to organize animation, remove token (Indicates layer visibility) in the layer 2 tabs and tabs copy copy.


palette animation to create a new frame, see picture below:


layer tabs appear again copy ...


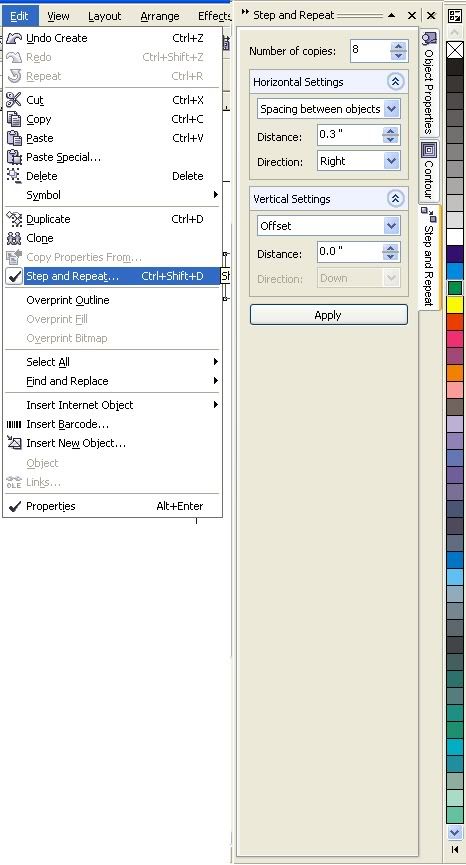
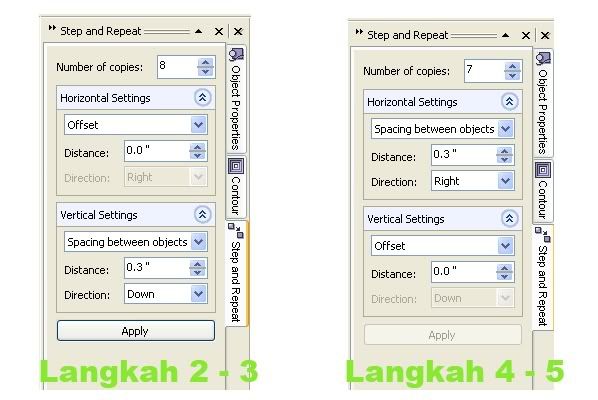
select the frame and then click tweens animation frames ... give the value of 1 [frame to add] ...


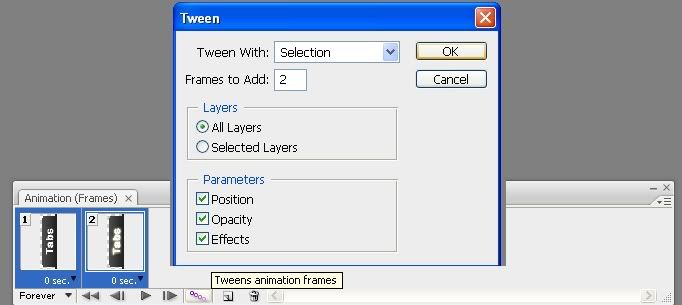
duplicate another frame the same as for a new frame ... in the last frame change layer visibility tabs missing copy and copy 2 tabs appear ...


select the frames again and do the Tweening like that, give the value of frames to add 1 ...


again duplicate frames and set the tabs visibilitynya copy 2 missing tabs appear ...


select the two frames do Tweening process, give yourself 2 [frames to add], and the last frame set the delay to 5.0 second


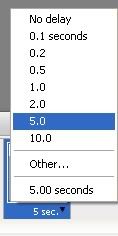
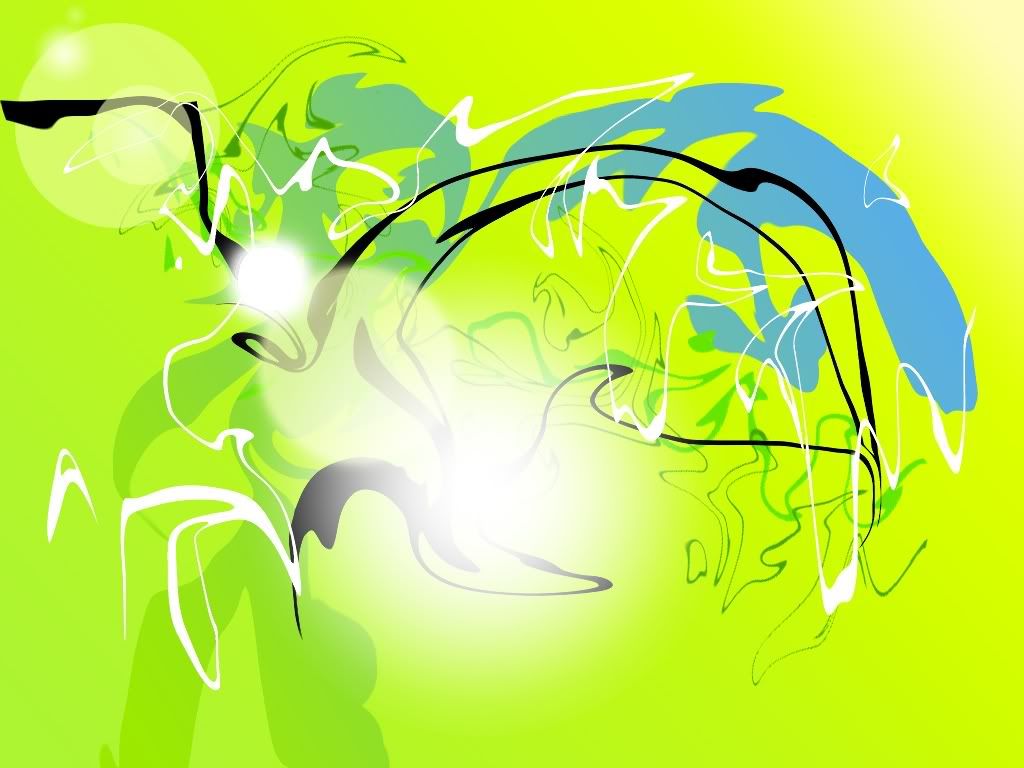
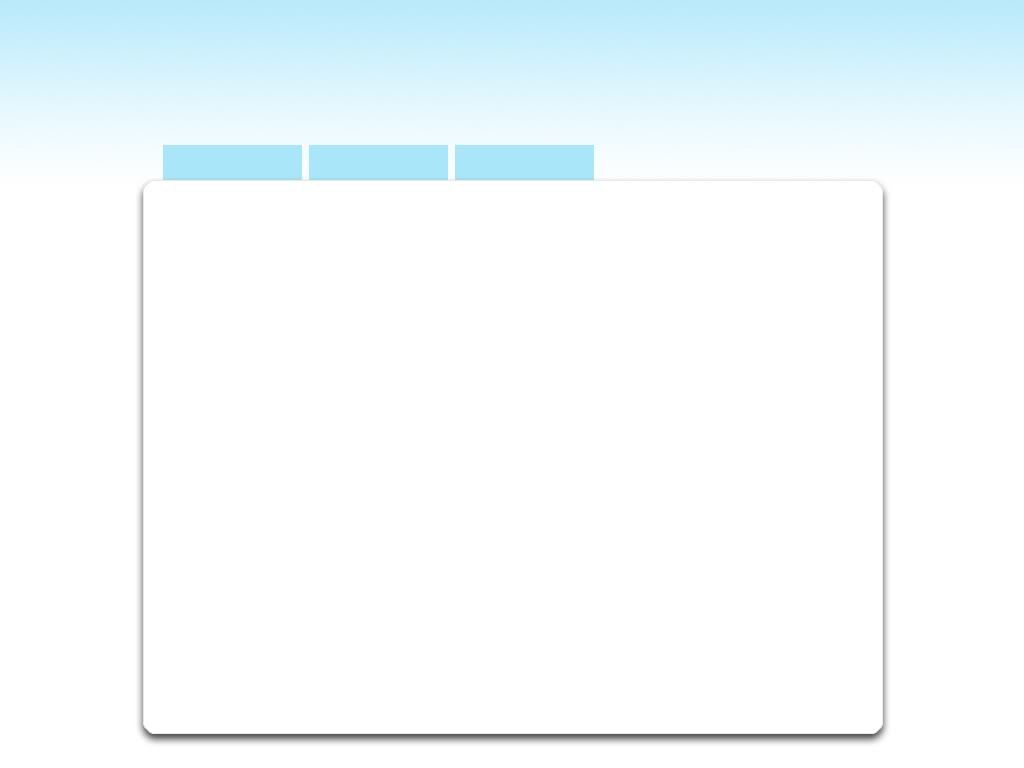
The end result is on page top. Save the file by File > Save for Web and Devices cilck gif and select the save button ... jadi dha...


Do not forget the file stored in the form of psd, ( password ), because if you want to create different tabs to multiple hidden object with tab, only changed the color ... and layer 2 can be raised opacitynya more clearly let gradation...

Make hidden object with tab


Nha, I have a post article like this, Membuat Objek Tersembunyi that have an effect, the button wrapper apart with his hidden objects.


but, If the tab will be added to call the object.

How to make it :

in the HTML

put this code into the file CSS :


#gb{

position:fixed;

top:50px;

z-index:+1000;

}

* html #gb{position:relative;}

.gbtab{

height:100px;

width:30px;

float:left;

cursor:pointer;

background:url('tabs-ani.gif') no-repeat;

}

.gbcontent{

float:left;

border:2px solid #ff0000;

background:#ffffff;

padding:10px;


and then put this code to the body :


<script type="text/javascript">

function showHideGB(){

var gb = document.getElementById("gb");

var w = gb.offsetWidth;

gb.opened ? moveGB(0, 30-w) : moveGB(20-w, 0);

gb.opened = !gb.opened;

}

function moveGB(x0, xf){

var gb = document.getElementById("gb");

var dx = Math.abs(x0-xf) > 10 ? 5 : 1;

var dir = xf>x0 ? 1 : -1;

var x = x0 + dx * dir;

gb.style.right = x.toString() + "px";

if(x0!=xf){setTimeout("moveGB("+x+", "+xf+")", 10);}

}

</script>

<div id="gb">

<div class="gbtab" onclick="showHideGB()"> </div>

<div class="gbcontent">

<!-- this content with the content you want, if you can not remove credit below it ... please -->

<br/>

<div style="float:left;width:100%">

<div style="float:left;"><h3 style="margin:0px">Title</h3></div>

<div style="float:right;"><a href="javascript:showHideGB()" style="text-decoration:none">[x]</a>

</div>

</div>

<br>

<br>

<a href="http://balidimataku.blogspot.com">Get Hidden Floating Objek</a></div>

</div>

<script type="text/javascript">

var gb = document.getElementById("gb");

gb.style.right = (30-gb.offsetWidth).toString() + "px";

</script></div></div>


for Blogger


first of all, you must login into the blogger


both in the edit HTML, edit pages and create a new gadget select html text.


Third, copy the following code :


<style type="text/css">

#gb{

position:fixed;

top:50px;

z-index:+1000;

}

* html #gb{position:relative;}

.gbtab{

height:100px;

width:30px;

float:left;

cursor:pointer;

background:url('tabs-ani.gif') no-repeat;

}

.gbcontent{

float:left;

border:2px solid #ff0000;

background:#ffffff;

padding:10px;

}

</style>

<script type="text/javascript">

function showHideGB(){

var gb = document.getElementById("gb");

var w = gb.offsetWidth;

gb.opened ? moveGB(0, 30-w) : moveGB(20-w, 0);

gb.opened = !gb.opened;

}

function moveGB(x0, xf){

var gb = document.getElementById("gb");

var dx = Math.abs(x0-xf) > 10 ? 5 : 1;

var dir = xf>x0 ? 1 : -1;

var x = x0 + dx * dir;

gb.style.right = x.toString() + "px";

if(x0!=xf){setTimeout("moveGB("+x+", "+xf+")", 10);}

}

</script>

<div id="gb">

<div class="gbtab" onclick="showHideGB()"> </div>

<div class="gbcontent">

<!-- this content with the content you want, if you can not remove credit below it ... please -->

<br/>

<div style="float:left;width:100%">

<div style="float:left;"><h3 style="margin:0px">Title</h3></div>

<div style="float:right;"><a href="javascript:showHideGB()" style="text-decoration:none">[x]</a>

</div>

</div>

<br>

<br>

<a href="http://balidimataku.blogspot.com">Get Hidden Floating Objek</a></div>

</div>

<script type="text/javascript">

var gb = document.getElementById("gb");

gb.style.right = (30-gb.offsetWidth).toString() + "px";

</script></div></div>


you must change this :


red text should be replaced in accordance with what you want ... the Title that can be replaced with the title of your gadgets.

for the tab you can also change, maybe it does not fit with your desire ... hehe

Here I make a tutorial Membuat Tab untuk Objek Tersembunyi


Shown photo Offline and Online

Your photo collection on hard drive or Flickr you can refer from a software. Way too easy ...

Applications that are fairly unique one. It allows collection of your photographs, either on disk in a PC and have run in virtual worlds (like the Flickr photo bookmark service, Picasa, or Facebook), can be viewed from a program. Search results in Google's images can be displayed outside the browser.

How to display each picture is also unique because it is displayed through a window of three-dimensional impression. Manage very xylophone pegerakan 3D effects added fun to notice.

Sorry, the title of this application have not even mentioned. His name is Cooliris. The makers call it a full-screen 3D wall. Actually it is a plugin for Internet berowser compatible with Mozilla Firefox, Internet Explorer, and Safari, making it suitable for Windows, Linux, and Mac OS, as well as some other Operating System.


Although tangible browser plugin, you can activate it through the list of programs in the Start menu in Windows. Because the nature of three-dimensional graphics card you have indeed qualified kudu, although not required, or the latest high specification.

To be able to use it, you must first install this plugin by visiting this site. Installation easy way, just like management. Cooliris also work with video display collection.

  1. Run your browser is supported Cooliris (Mozilla Firefox, Safari, or Internet Explorer). go to Cooliris. Select the appropriate apliasi with browser and operating system you use, then click [Download] is there on the right side.
  2. If you use Firefox, will display a pop-up bar under the top of the browser toolbar. Just click [Allow]. Box "Software Installation" will appear. Click the [Install Now]. Afterwards, restart your browser (turn off and then run back).
  3. Now, every time a picture or photograph appeared in a number of web sites (such as Google Image, Flickr, or Facebook), then the images can be independent in Cooliris ditampilan. First, point the pointer to the image until an icon appears bertana two key arrows above the picture.
  4. Click on the image, the image will appear in the Cooliris 3D wall. To enlarge the image, you can click on one of the images so enlarged. Quality image that appears will be adjusted with the original image resolution. If small, but forced to be large, the image will be broken.
  5. 3D wall that you can slide the shift while selecting photos. Click drag the image area in the direction you like, then the wall will move in three dimensions. To zoom in or zoom out the picture range, use the scroll button on the mouse.
  6. Try to log in to your account and into your Facebook photo collection. Point your photos in a collection of photographs there, and then click on the image when the two icons appear with the arrow keys. Now all your photo collection will be displayed on the Facebook wall. Facebook logo will automatically appear at the top of the wall.
  7. If you want to display the photos in your PC hard drive, click [My Computer] on the sidebar on the left side of the wall. If you save it in My Pictures folder, click the [My Pictures]. If stored on the desktop, click [Desktop].
  8. If you save it in a folder in a directory, disk partition, or stored in a flash drive or external hard drive, click the first link [Disk]. Next, select the directory or drive, and browse to the existence of the root folder of images that appear.
  9. This application can be accessed directly from the program list by clicking the [Start]> [All Programs] > [Cooliris] > [Launch Cooliris]. Cooliris also can function as a search engine for pictures and video. To use it, point the pointer to the box "Search" at the upper right side.
  10. Use keywords, then select a website where pictures or videos to search from Google, Yahoo, Flickr, Picasa, to YouTube. Next, click the magnifying glass icon or press [Enter]. The result is shown in the wall. Click on the picture or video to show it.

Make a hidden floating division


are you have to view a shoutbox or ShoutMix was hidden?!?, hehehe... The tutorial has a lot of writing, but why do I still write it ?!? I don't know about it?!? wuakkakaka


How to Make it :


In a HTML,,


Put this Code into the file CSS :


#gb{

position:fixed;

top:50px;

z-index:+1000;

}

*html #gb {
position:relative;}

.gbcontent{


float:left;

border:2px solid #A5BD51;

background:#F5F5F5;

padding:10px;

}


and this Code apart of Body... [ <body>...</body> ]


<script type="text/javascript">

function shoutmix(){

var gb = document.getElementById("gb");

var w = gb.offsetWidth;

gb.opened ? moveGB(0, 0-w) : moveGB(0-w, 0)

gb.opened = !gb.opened;

}

function moveGB(x0, xf){

var gb = document.getElementById("gb");

var dx = Math.abs(x0-xf) > 15 ? 10 : 1;

var dir = xf>x0 ? 1 : -1;

var x = x0 + dx * dir;

gb.style.right = x.toString() + "px";

if(x0!=xf){setTimeout("moveGB("+x+", "+xf+")", 10);}

}

</script>

<div id="gb">

<div class="gbcontent">

<!-- this content with content that you want, to reply can not be removed under the credit, Ok!!!... please -->

<br>

<br>

<a href="http://balidimataku.blogspot.com">Get Hidden Floating Objek</a>

</div>

</div>

</div>

<script type="text/javascript">

var gb = document.getElementById("gb");

gb.style.right = (0-gb.offsetWidth).toString() + "px";

</script>

</div></div>


( explanation sometime, ok?!? this is important so let me quickly, hehehe )


for Blogger


first, you must login into the blogger


both in the edit HTML, edit pages and create a new gadget select html text

The third copy code below:
:

<style type="text/css">

<!--


#gb{

position:fixed;

top:50px;

z-index:+1000;

}

*html #gb {
position:relative;}

.gbcontent{


float:left;

border:2px solid #A5BD51;

background:#F5F5F5;

padding:10px;

}


-->

</style>


<script type="text/javascript">

function shoutmix(){

var gb = document.getElementById("gb");

var w = gb.offsetWidth;

gb.opened ? moveGB(0, 0-w) : moveGB(0-w, 0)

gb.opened = !gb.opened;

}

function moveGB(x0, xf){

var gb = document.getElementById("gb");

var dx = Math.abs(x0-xf) > 15 ? 10 : 1;

var dir = xf>x0 ? 1 : -1;

var x = x0 + dx * dir;

gb.style.right = x.toString() + "px";

if(x0!=xf){setTimeout("moveGB("+x+", "+xf+")", 10);}

}

</script>

<div id="gb">

<div class="gbcontent">

<!-- this content with content that you want, to reply can not be removed under the credit, Ok!!!... please -->

<br>

<br>

<a href="http://balidimataku.blogspot.com">Get Hidden Floating Objek</a>

</div>

</div>

</div>

<script type="text/javascript">

var gb = document.getElementById("gb");

gb.style.right = (0-gb.offsetWidth).toString() + "px";

</script>

</div></div>


and then save, finish it


the explanation :


function shoutmix(){


above code is very important, [shoutmix function () (], the bold can be replaced with anything (just do not symbol weird), shoutmix code is the JavaScript function called when using the tag [href].


I explain this further explanation related to...


and then... how to call it...


<a href="javascript:shoutmix()">ShoutMix</a>, this is the example...


For contents, located on the red text, replace it with content that you want to ...

Tips slightly, if the template you have menu bar, add the href code earlier, as

<li><a href="javascript:shoutmix()">ShoutMix</a></li>, rata-rata template di blogger pake tag <li> ... </li> so the whole tag like that ... hehehe


I hope you can understand with my explanation...


Sometime I'll try to make articles like objek hiddennya multiple...


Jegeg Jegeg Singaraja


"Cantik-cantiknya Singaraja", Really?!?

I agreed because I was a Singaraja, hahaha

The photo above is the author of the song with the same title as the title of this post

Jegeg - Jegeg Singaraja.

"He said, "I'm amazed at girls - especially girls Bali Singaraja, ... Beautiful, plump, sexy, spirit ... and so on deh ..."


Not only was it a song, during the 3 months before he (Mahesa) has made the world in an uproar even Bali Singaraja, even well beyond the Bali ... hahaha, gmana do it?!?

he's from HP to HP. Although many of the same ga like the song, but many others like it even know the figures pengen closer. (actually I myself was also afraid for this post, because many of the pros cons of the songs, heee ... serem)

The story or the story Mahes puanjang,, may be seen from the songs that he made.

Now I discuss the song, maybe just the Balinese's all I can understand this song ... Satirical point of this song Eve (ciah! weather, ha ha), because it is in fact the girls today are wrong a lot of interaction ... (I'm sorry, beauty, torn kemolekannya girlfriend, friends, and even some girls who were censored ******** aja deh).

But not only the Eve because she was hurt not because of the weather alone, had a friend say something that is not true about him ... wahh !!!... 2 day straight out of the song ... wkwkwk, ... the title is "
Bungut Corah".

Indeed this one was really creative ... He used to open the PS rental business, but now business is slow so he switched to business distributions. (Wadhu..'s Ga abis duit nghasilin reason to ...).

Jump aja deh, biar ga rambling ... I resmi'in own blog is a blog link to download the songs Mahesa ... (I uploaded the file gradually became dependent kalo ada buat duit internet aja, hehehe) for the download link can be seen in the Sidebar (the right side of this post).

Mahesa in Mirror ( berkaca )!!!, As He Said :


memang kalau dirasakan secara sepintas lagu ini banyak mengandung unsur kritikan yang pedas untuk kaum hawa bahkan bagi orang-orang yang menganggap dirinya sempurna. Tapi kalo di artikan secara lebih dalam, kalian semua pasti akan mengerti bahwa lirik yang ditulis mengandung sebuah arti dan pelajaran bahwa apa yang terjadi saat ini maupun kesalah-kesalahan yang dibuat mungkin bisa dibenahi dengan mendengarkan lagu-lagu ini.

Meskipun banyak pro dan kontra, tapi saya tetap mengutamakan unsur kesederhanaan dalam penggunaan bahasa agar bisa di mengerti lebih dalam terutama oleh orang Buleleng karena selama ini lagu-lagu Bali terasa malu untuk didengarkan oleh anak-anak muda makanya saya berusaha untuk mengajak kaum muda untuk lebih mencintai lagu berbahasa Bali dengan lirik-lirik yang sederhana dan gampang untuk dimengerti.
Disini saya sengaja membangkitkan bahasa Buleleng, karena disisi lain saya ingin mengajak masyarakat Bali lebih akrab dan tidak salah mengartikan ataupun mencerna bahasa-bahasa yang ada di Buleleng, karena pula ( karena lagi, karena lagi, hahaha ) bahasa ini adalah bahasa-bahasa keseharian bahkan menjadi sebuah keakraban bagi masyarakat Buleleng seperti Cai, Nyai, Siga dan temen-temennya itulah.

Mudah-mudahan lagu-lagu ini tidak hanya sebatas didengar dan dicela, tapi artikan lebih dalam lirik-lirik dan nasehat yang ditulis.

Jaya Buleleng !!! ( D'Laskar Banyuning )


that's the message from Mahess... I had negotiate this problem ... all, I launch negotiations on 25 November 2009. (I Don't know when it will be published this post ... hehehe)


I also participate to give same message that you want to hear it,, Melaang gen ngabe Ibe ... hehehe (Be careful with yourself)


Sunday, November 22, 2009

Abstract Art dengan Adobe Photoshop CS3...


If usually we see pictures of abstract form were made using Adobe Illustrator ... but I tried to make it using Adobe Photoshop CS3 that I have ...

  1. First create a new document with size of 1024 x 768 pixels ...
  2. Create a new layer and name it [abstract_line1]
  3. Continued ... we create the object using the Rectangular marquee tool ... make a selection with a line that extends ...
  4. Setting foreground color to green, for example ...
  5. Tekan alt + del... ( alt + del digunakan untuk memberi fill objek dengan warna foreground, ctrl + del digunakan untuk memberi fill objek dengan warna background )
  6. Press ctrl + D to deactivate the selection (deselect)
  7. nah... Now we begin to destroy an object made of abstract ... hahaha ...
  8. Make sure the layer [abstract_line1] are in active state ...
  9. then press the [filter] > [liquify ... ctrl + shift + X] ... wait until the dialog box appears like the following picture ...
  10. Use the forward warp tool ... set the brush size required
  11. Begin scraping brush from left to right ... (See picture below)
  12. Add more movement once with the following pattern ...
  13. At the core of the movement in accordance with art that we have ...
  14. Try it with other forms of object ...
  15. to beautify use Filter > [Render] > [Lens Flare] ... setting follow suit ...
  16. The steps above only just tips ... now depends on your creativity using the tips above ... May assist ... that something was wrong, forgive me ... ok?!?


Finally...


Tips, use a simple initial object ... and the size not too big ... to display the results liquify so beautiful ...

Learning CSS ?!?

Lerning CSS ?!?


Before, we have learning about Mendesign Web Sederhana + CSS, I forgot, I must explain about CSS ...


Lets we study CSS to more !!!


Really, I also don't know more about CSS, Cascading Style Sheet, that's the long text of CSS... if I look from my experience to use CSS...


Can I explain like this :


  1. With CSS, we can setting more easily for division which we want... with setting the attribute from file CSS, and then we can call [ id ] and [ class ] to file html or php or others.

  2. We can change all of type or element from basic HTML tag, like : h1 (heading), ul, ol and li (ordered and unordered list), p (paragraph) and other attribute.

  3. To merge element with setting which same with other element, example : h1, h2, h3 {font-family:arial, and You can learn more and more with download this file here and the password here


Saturday, November 21, 2009

Download Design Software


There are several programs that I offer design, Macromedia Dreamweaver 8, Adobe Photoshop CS3 and CorelDRAW X3.


for while I am still using it, because of limited computer power, hahaha ...


but that softwares not lose the same version of the above, except that only a few ...


Simply download the file yourself, ok ...


Macromedia Dreamweaver 8


CorelDRAW X3


Adobe Photoshop CS3


Membuat pola bunga dengan polygonal tool


Maybe this tutorial tips are widely known, usually written in the books. but now I try to write for people who do not know and control who knows a little money, hehehe ...


langsung saja, pertama-tama buatlah sebuah lembar kerja dengan ukuran terserah anda... atau bisa dibilang abaikan semua settingan awal.


lalu buatlah objek polygon dengan ukuran sesuai anda, pada panel properties atur [ Number of point or sides on polygon, star and complex star ], yang saya gunakan adalah 8, tapi nilai ini tidak mutlak anda bisa menggunakan nilai yang lain. ( untuk lebih jelasnya lihatlah pada gambar dibawah... )


Lalu gunakan shape tool untuk memulai membentuk objek polygon tadi


seteleah membuat lekukan pertama, lalu klik salah satu node ( node adalah titik kecil point dari sebuah garis dari sebuah objek ) lalu convert node tadi ke bentuk Curve, option ini terdapat pada Properties Panel


Pada gambar paling kiri saya beri nomor 1, pada objek ini salah satu nodenya sudah di convert dan sudah dirubah bentuknya menggunakan shape tool.


Lalu lakukan pada Node yang lain dan ulangi langkah sebelumnya ( pada gambar 2 atau tengah-tengah ).


Pada gambar ketiga atau paling kanan, adalah hasil dari pengolahan Polygonal tool atau bisa dibilang hasil akhir, hehehe...


Kalo ada yang kurang mohon dimaafkan ya... maklum namanya juga masih belajar...


Tuesday, November 17, 2009

Mendesign web sederhana dengan Adobe Photoshop + CSS


Untuk designnya mungkin tidak akan saya jelaskan cara pembuatannya karena sangat sederhana...


Usahakan hasil potongan atau slicenya ada 4 bagian seperti gambar dibawah.....


bg body

bg atas

bg tengah


bg bawah


  1. Pertama buka Aplikasi Dreamweaver...

  2. Atur Page Propertiesnya seperti gambar dibawah


    • Keterangan Gambar :

    • Untuk margin beri nilai 0 pixel (margin-left, margin-top, margin-right, margin-bottom)

    • Background-image : pilih browse, lalu cari gambar background yang telah anda buat designya sendiri... ( bg body pada gambar diatas )

    • Beri repeat : repeat-x

    • Background-Color : #ffffff ( putih )

    • Text-color : pilih sesuai selera ( saya menggunakan kode warna= #333333 ) dengan sizenya : 12px dan Font : arial...

    • sehingga hasilnya seperti berikut :


  3. lalu tambahkan syntax CSSnya sedikit :

  4. <style type="text/css">

    <!--

    body {

    background-color: #FFFFFF;

    margin-left: 0px;

    margin-top: 0px;

    margin-right: 0px;

    margin-bottom: 0px;

    background-image: url(images/lat1_01.gif);

    background-repeat: repeat-x;
    }


    body,td,th {

    font-family: Arial, Helvetica, sans-serif;

    font-size: 12px;

    color: #333333;

    }


    #wrapper {

    width:774px;

    margin:180px auto 0px;

    }

    #bg_atas {

    background-image:url(images/lat1_04.gif);

    background-repeat:no-repeat;

    width:774px;

    height:60px;

    float:left;

    background-position:bottom;

    }

    #bg_mid {

    background-image:url(images/lat1_07.gif);

    background-repeat:repeat-y;

    width:774px;

    float:left;

    }

    #bg_bawah {

    background-image:url(images/lat1_09.gif);

    background-repeat:no-repeat;

    width:774px;

    height:31px;

    float:left;

    }

    #menu {

    margin:0px 0px 0px 30px;

    }

    #menu a:link, #menu a:visited {

    background-color:#00CCFF;

    float:left;

    padding:5px;

    color:#FFFFFF;

    font-weight:bold;

    text-decoration:none;

    margin-left:5px;

    }

    #menu a:hover {

    background-color:#00CC00;

    }


    -->

    </style>
  5. dan dibagian bodynya masukkan syntas ini...


  6. <div id="wrapper">

      <div id="bg_atas">

         <div id="menu">

            <a href="#">Home </a>

            <a href="#">ads</a>

            <a href="#">edit</a>

         </div>

      </div>

      <div id="bg_mid">

            <p>&nbsp;</p> <!-- Kamu bisa taruh isi web kamu disini -->

            <p>&nbsp;</p> <!-- Kamu bisa taruh isi web kamu disini -->

            <p>&nbsp;</p> <!-- Kamu bisa taruh isi web kamu disini -->

            <p>&nbsp;</p> <!-- Kamu bisa taruh isi web kamu disini -->

            <p>&nbsp;</p> <!-- Kamu bisa taruh isi web kamu disini -->

            <p>&nbsp;</p> <!-- Kamu bisa taruh isi web kamu disini -->

      </div>

      <div id="bg_bawah">

      </div>

    </div>


  7. wadhu... akhirnya jadi... mudah kan... dimaafin ya kalo ada salah... kalo mo tanya2,, via email aja ok!!!

  8. Dan dipastikan syntax diatas tadi, kompatibel di berbagai browser... mungkin, hehehe... tapi setau saya baru coba di Opera 10, Mogilla firefox 3.5.3 n IE 6... yg pasti udah ok disana semua... klop abis deh...


CopyRights Narayana Yein dengan coding template dari kendhin's blog, Narayana yein 2009. Hosting by 000webhost and domain from www.co.cc